Author Archive
Miniature Wargaming Series- 3 Painting the Insurgents
by Steve Struebing on Aug.27, 2010, under technoPHOBE
Welcome to the third installment of our wargaming series (focusing on Ambush Alley). Just a note before I begin about 15mm miniatures. There are tons of people out there who can make stunning, photo-realistic, perfect minis even at 15mm. 28mm minis can show a lot of detail and painting errors on the table top. However, 15mm minis are more forgiving (and are less expensive to get lots of figures out there). The world is zoomed out just a bit more in that scale. A perfectly painted table top is ALWAYS better, but I don’t have that kind of skill, so this is about how to get that pack of shimmering lead-free lead on the table and made “field grade”, as I call it (as opposed to “demo grade”). It’s not perfect, but at a glance, its good enough.
Miniatures Source:
The minis I am using here are from Rebel Minis. This is where I have also purchased my Regulars troops (the good guys).
Tools/Techniques:
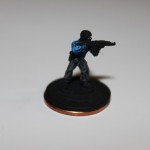
The primary technique used is called “drybrushing”. The intent is that you lightly brush on a LITTLE BIT of paint onto the high areas as the light would naturally fall on the higher regions of the model. Google “Drybrushing” or watch youtube. There are probably 1000 videos out there to get you started. The rule: dip your brush, and brush away virtually ALL of the paint. Then start lightly feathering on the paint across the grain of the high regions. If there are vertical bars raised, brush horizontal, for example.
3 colors of depth look really good, but I use 2 plus the black primer. The trick is using progressively less paint and lighter colors as you move up to the highest surfaces of the mini. Also, the rule is work from the inside out when painting the mini.
You’ll need
- Fairly fine paint brush
- Fine black stone (craft store. Looks almost like ground up volcanic glass)
- Black spray primer (hobby store)
- Penny (for the miniature base)
- Elmer’s glue for the mini/penny
- Minis
- Assortment of acrylic paint (get it at any craft store)
- Spray sealer (hobby store)
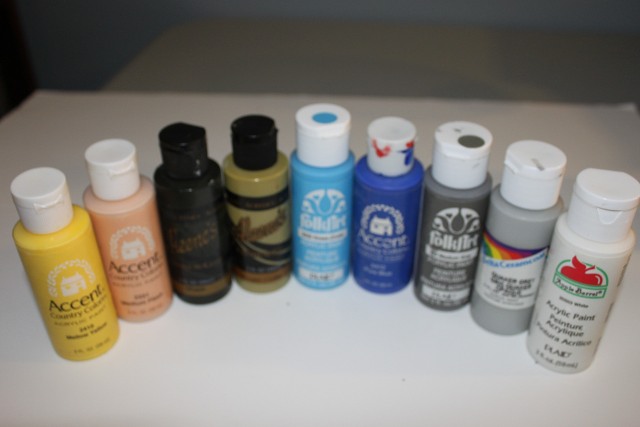
Here is the full assortment of paint I used for this mini:
- Pure White
- Black
- Dusty Khaki
- Ocean Blue
- Blue
- Medium Gray
- Quaker Gray
- Medium Flesh
- Acorn Brown (oops, didn’t make it into the picture)
Mini Prep
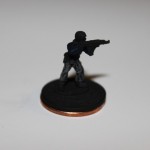
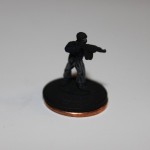
Cut away any of that extra metal hanging off the mini that is a result of the casting process. That crap is called flash. Next glue the mini onto the center of your penny. After the glue has dried, use your black primer. A couple coats sparingly, but cover fully.
Completing the Miniature Base
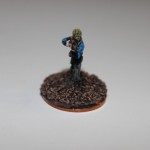
A little bit of work really goes a long way towards the overall look of the miniature. It gives the figure a real world look, and sets up a nice contrast for the rest of the mini detail. I’ve chosen fine black stone, and will dry brush 2 “sand” types of colors over the top.
Completed Figure

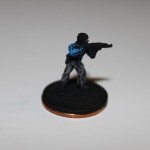
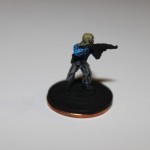
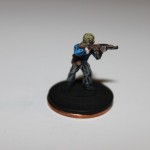
Paint black around penny edge, yellow to mark him as a "leader" in the game, and seal the mini. Done.
And there we have it. You can use all different mixes of pants and shirts colors. Mine are a good mix. Also, the minis are good to do in batches because you can be working on the next mini as one dries. It’s kind of a like an assembly line where you do all the same parts that are the same colors at once. You’ll have your baddies on the table in no time! Good luck!
Miniature Wargaming Series- 2 Making Terrain
by Steve Struebing on Aug.21, 2010, under technoPHOBE
In the last post, we got a simple sense of what this whole wargaming thing is, and have our own 2 feet solidly beneath us (for those paying attention, its a 2 feet by 2 feet board). Now, lets get on to arguably the most fun part of the whole deal: Making Terrain.
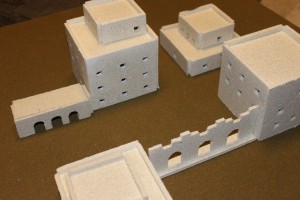
As I mentioned in the last article, my grandfathers were great at modeling life in miniature. This is the appeal of meticulously detailed model railroads. While non static, once they are set up they are set up. This is where wargaming is set apart. You can reconfigure, and use the terrain to play a game. Well, let’s get cracking here. We have a city to build.
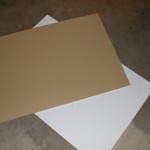
Foam Board Selection
The first step is foam board for building our houses. Pick it up at local craft store. Lots of colors available, but brown, tan, black, and white are probably the best for you (depending on the region you want to model for your wargaming).
Cutting Foam and Scale of Minis
First, a note on scale. I am sure that it’s well posted somewhere, and there are lengthy dissertations on the matter, but I homegrew scale. First, I took a look at an upright standing 15mm miniature, and he measures approximately 3/4 of an inch. If an average man is 6 feet tall for these purposes, then its 2 feet per 1/4 inch. Thus, for a one story building at 10 feet per story, it should be 1 1/4 inches per story.
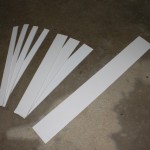
Prescribed Cutting Widths:
- 1 1/4 inches (for the reason noted above. For 1 story buildings.)
- 2 1/2 inches (for 2 story buildings)
- 4 inches (for roofs for buildings that are 4 inches long and wide)
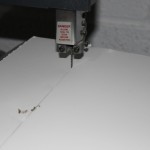
A bandsaw is simply magic for cutting foamboard. It is loud as hell indoors, so wear ear protection, but it cuts perfectly every time.
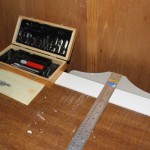
Measuring, Cutting, and Scoring the Foam
In this example, we are going to walk through the creation of a 4 inch square, one story building.
- T-Square
- X-Acto Knife
- Cutting Surface
- Measuring device (ruler, whatever)
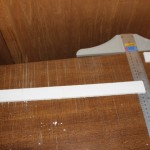
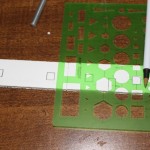
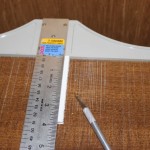
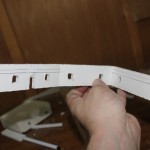
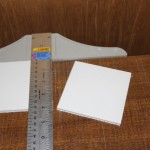
Take one of your 1 1/4 inch strips and for the FIRST measurement, mark 4 inches, plus 3/16 inch. This little extra is to account for the thickness of the cardboard when you fold your box so it will be perfectly square. This only has to be done for the first wall, because the additional 3/16 inch will glue to the opposite wall (covered later). Just remember the 3/16 inch for the thickness of the foam. You’ve got to account for it in several places.
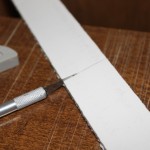
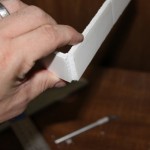
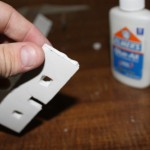
Now the scoring bit. This is to cut through the outer layer of paper and a bit of foam so you can bend it at an angle. DO NOT CUT ALL THE WAY THROUGH!
Test Fit and Cutting Windows/Doors
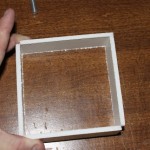
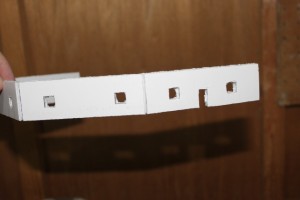
We’re starting to get somewhere now! Ok, next just do a fest fit to make sure the corners are square, and you’ll see how the extra 3/16 inch lip fits against the edge of the wall flushly. For windows, I have a little square stencil I use to draw squares and rectangles. For windows, put their center about 1/3 up the wall, not at the midpoint. If you cut them into the midpoint, you will see the roof supports through the window, which is unsightly. How DARE you. You could opaque the windows with some tissue paper in the back, but I am not that hardcore. Just use the damn 1/3 up rule, will ya?
Next cut out the windows and door carefully with your X-Acto knife.
Becoming a Roofer/Closing the Deal
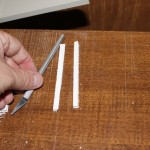
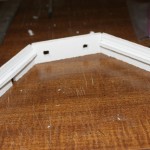
We’re now at the place where we are going to be prepping the roof supports. Its nice to have a slightly recessed roof so the minis look like they are down on it, and its nice when you stack other buildings on top. I recess it about 1/4 inch. First, we cut roof supports. These are thin strips that are 4 inches in length or less for this house. They obviously can’t be longer than a wall because the house won’t fold into a square otherwise.
Now, mark your lines for where the stips will go. 1/4 down from the top for the recession, 3/16 to account for the width of the roof, and another 3/16 for the width of the roof supports. I glue them in edge on.
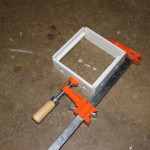
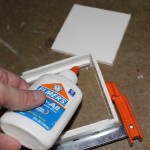
Now, we cut a 4inch x 4 inch roof off our other strip, apply glue to the roof supports, and let it dry. We are almost all done now.
Home Sweet Home
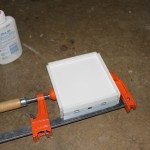
Now, we’ll put the roof on, and admire the handywork as it dries.
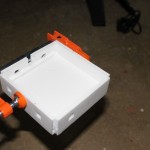
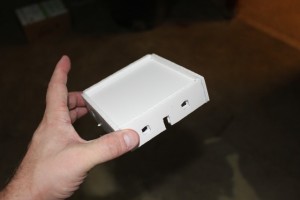
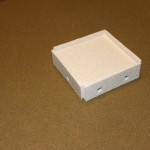
All built and dried it should look like this and be ready to remove from the clamp.
Texture, I didn’t even know her…
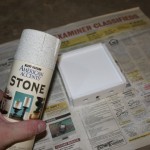
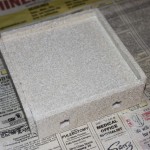
Now we apply a textured spray paint to give the house a stone look and feel.
Home on the Range, building your town.
Well, you’ve done it. You’ve build your first building. Now, you can vary number of stories, width, etc., using the same technique. I really primarily rely on 4 inch, and 2 1/2 inch square buildings. They stack well, and can create a nice little town. Enjoy the tour…
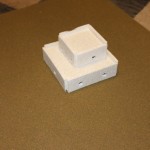
Oh wait? The STACK? This is a 2 1/2 inch square on top. You'll also use the 2 1/2 to roof. It's a good system!
Going into Mass Production, and Building The Metropolis
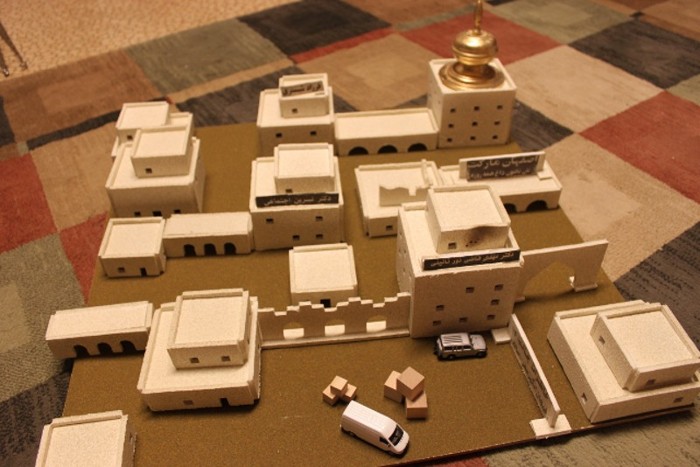
Build, build, build. Get creative with walls, decorations, and stuff lying around the house.
Accessorize for Realism
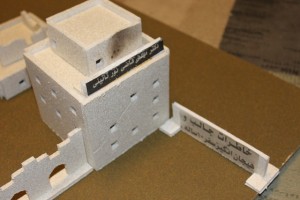
I don’t know a lick of Farsi, so I went to my favorite neighborhood kebab place and got a regional newspaper to make signs. The Kebab e-Kubideh was also delicious. The generally have them there. Look in the advertisements and cut some out for signage.
Finishing Touches
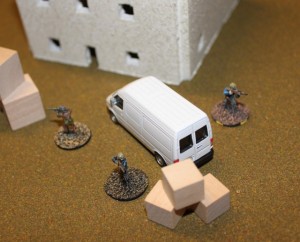
I grabbed some blocks from a craft store, grabbed some scale cars (N-scale, I think?!!) and have a nice little town where trouble’s-a-brewin. Happy Hunting!
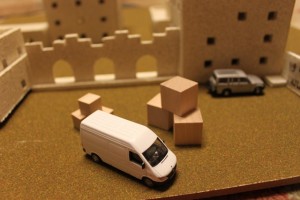
Looks like a delivery for ol' Polymythic. I hope its some chow. It's been a long day building a city from nothing..
I hope this shows you it really is not hard to get going. Your creativity will take you a long way. Look around the craft store. Imagine some of the things you’re about to throw away spraypainted black. If the shape is interesting, you can probably use it. I’m looking forward to taking a virtual tour of your tiny ‘ville sometime soon. In the next post we’ll paint up some baddies to introduce a little turmoil to our currently placid burg.
4/17/2012 Note: Found another blog whose stuff is just too good not to link in.
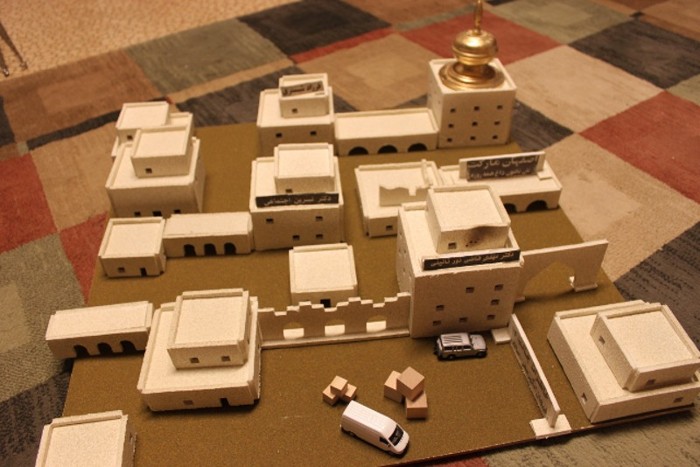
The lights are much brighter there, you can forget all your troubles, forget all your cares, and go DOWNTOWN!
Miniature Wargaming Series- 1 Building the Board
by Steve Struebing on Aug.21, 2010, under technoPHOBE
This will be a slight divergence from technologies vs. anti-technology type projects. I have been an avid player of games for a long time. Perhaps not everyone is aware, but there has been an renaissance of boardgames while the American boardgame market has been fairly dominated by “old favorites” like Monopoly, Stratego, Risk, and others. Not making a judgement here, I do love me some Stratego.
The world of “gaming” is a wide one. The strongest of my callings in terms of hobbies is non-video games (ok, so this CAN qualify as a technophobe post). As a kid we would play Parcheesi as a family. My father never seemed to get the perils of creating roadblocks in that game! When the power went out and candles were lit, we could still play. There was something simple and grounding in that. This is not a boardgaming article, but I simply cannot avoid asking you, the reader, to give some Eurogames (as they are called because of the style of game originating in Germany) a shot. Settlers of Catan, Carcassonne, Pandemic, Ticket to Ride. All are simply fun, challenging, and addicting.
This 4-part series is about a style of game called the “Wargame”. I am not going to dig into the history, but the famous H.G. Wells would play these little games with his sons calling them “Little Wars”. From those humble and imaginative beginnings sprung the miniatures wargame. I have many, but I want to call attention to the one I have invested time into recently. It is a modern-combat (Call of Duty: Modern Warfare 2, anyone?) game of squad level combat titled Ambush Alley.
I will cover the following in this series:
- Building the Board
- Making Terrain
- Painting The Insurgents
- Painting the Marines
My grandfathers were hobbyists and builders. One a model railroad builder, the other making RC planes and small buildings. I truly wish I could have grown up faster, or had them live longer and seen who I am today. We would have had much in common (unsurprisingly, because they consciously or unconsciously set me on this path). We could have built things together. They could have been aware of the impact they had on me, a little boy amazed at their detailed and beautiful craft.
Let’s Start Simple – Building the Board
Battlegrounds can’t happen without the ground, of course, so let’s whip this up. This ain’t brain surgery, but lays the foundation..
This game is interesting in that it is played on a nice small 2×2 foot board, rather than the more typical 4×8 foot boards. The game is played with 15mm miniatures. As a thumbnail, movement is done by tape measure, combat resolved by dice, etc.
Materials:
- 2×4 Thin MDF Board (Lowe’s, HD)
- Railroad Grass Roll (Hobby Store)
- Glue (come on, buddy!)
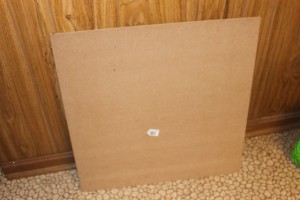
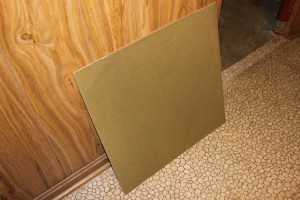
Go to your local Lowe’s or Home Depot, and get a 2×4 sheet of MDF. Ask them to cut it right down the middle, or do it yourself.
As I said, this is super simple. Don’t fall asleep on me, now we can start the good stuff.
Motion Feedback MP3 Trigger
by Steve Struebing on Apr.07, 2010, under technoPHILE
I posted over at Instructables a project that uses the Parallax PIR Motion Sensor (yes, it IS that same I used in the Halloween Hack, ye of the clan Observant) to encourage me to be working out. If I am, then I am rewarded with some tunes to keep moving along. However, if I am lazy and take a breather…well….. “No Snoop For You!”
The Parts List:
- SparkFun MP3 Trigger
- IO-204 Control Module
- Parallax PIR Motion Sensor
- PC Speakers
- Coffee Tin
- Drill
- 6xMachine Screws, and 12xNuts
Key objectives here:
- Try out the SparkFun MP3 Trigger
- Finally get a project into an enclosure that I think will be good for other people’s projects (this could be the next Altoids contender?)
- Delve into “Onboard Rules” functions of the IO-204 while offline
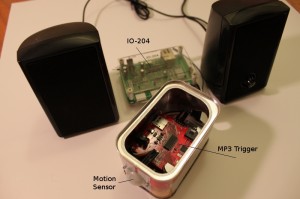
If you want more details, head over to the Instructables post.
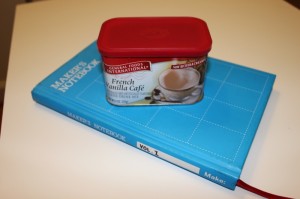
Here is the project enclosure. Admit it, you love you some Maker’s Notebook, too, don’t you? The MP3 Trigger sits snug as a bug in a rug with the machine screws and nuts anchoring it in place. 2 additional ones hold the PIR Motion Sensor to the front of the tin. Getting the larger hole in the front and back was tricky because I did not have a great pair of snips around. I’ll know for next time! I did manage to wear through several Dremmel bit tips in my stubbornness of using the wrong tool for the job.
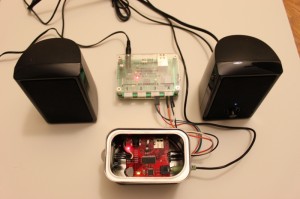
Here she be all wired up. Note, she AIN’T wired to the LAN, so this is using the “Onboard Rules” feature. If I did want to datalog the session, I would have to plug in to my router (which in this case really is not more than 10 feet away).
Making Acorn Flour and Muffins
by Steve Struebing on Dec.14, 2009, under technoPHOBE
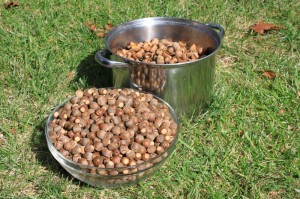
Acorns from my Oak out front
I am trying to recall the exact moment when I set my mind to making food from acorns. It could have been any of the following moments:
a) When reading “When Technology Fails” I wanted to take a stab at more self-sufficiency
b) When I listened to “Everybody Dance Now” I was inspired by “I’m just a squirrel tryin’ to get a nut”
c) When I moved to into my new house this summer, I saw the MASSIVE oak out front and knew the acorns were coming

Oak tree - the acorn donor

Oak leaf
Whatever planted the seed, it was obvious that I needed to make acorn flour. Apparently, acorn flour was a food that was made by native peoples (I have since confirmed reading some blogs of families of Native American descent who used to hoard massive amounts of acorns for making food).
The first step was harvesting the acorns. At the beginning it was not terribly easy as I stalked the yard (to the bewilderment of my new neighbors who must have thought me out of my mind… or rather, having “gone nuts”) looking for an acorn that had not fallen far from the tree. It became increasingly easy as the season wore on and by the end of fall, I was kicking myself for trying so hard at the beginning of fall where by the end I could, and did, rake bags full of the stuff. Ah well, you live you learn.

Acorns lying in the front yard

Not just for squirrels anymore
After having gathered what I considered a reasonable amount, the next step was removing the acorn top cupule. No, I did not know that word before I looked it up. Feel free to use it in scrabble for 10 points. That was easy enough for the “early season” acorns, and virtually did the job by itself for the late season ones.
Next was going through the stash and finding any acorns that showed evidence of rot, or worms.
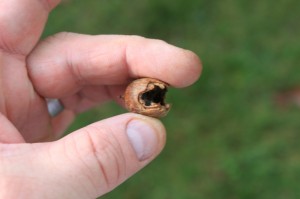
Damaged acorn
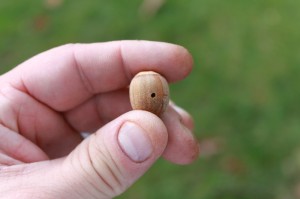
Telltale sign of worm presence
Next, and certainly the most fun (please note sarcasm) part of the process was shelling. I tried just using my hands, then a few with teeth, and finally settled on a set of adjustable pliers the perfect width to apply enough pressure just to crack the shell when closed. It was a slow and tedious process of cracking and peeling the somtimes stubborn shell from the nutmeat. Many a football Sunday was spent watching a game and shelling acorns. Yeah its weird, but damnit I was determined. When it was all said an done, the shelled acorns gave off a sweet, nutty, almost bourbon scent.
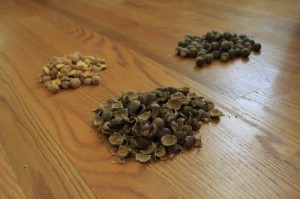
Unshelled, shelled, and acorn shells
So before you just run off and throw a handfull of shelled acorns into your mouth and consider yourself educated, there is something you should know about acorns. Apparently they are very high in tannic acid. This is not good for your system (I have read somewhere that even animals may wait for rains to rinse the tannins). Take a small nibble of an acorn and you will feel that rough acidic bitterness that will turn you off from said handfull. The proces of removing this water-soluble acid from the nutmeat is called leaching. I effectively chopped the acorns into smaller bits to increase the surface area and allowed the water to do its work.
The water browned significantly the first morning, so I changed the water. Then the first night, so I changed the water. Then day 2 morning and night so I changed the water. Then day 3…then day 4… you get the point. 2 water changes for over 2 1/2 weeks. After that time, I tasted the acorn and there was very little residual acidicy, so it was onto the drying phase. I have read its possible to to leach by putting a pillowcase of acorns in stream for a while to do this, or in extreme cases, put them in the upper tank (I repeat, UPPER TANK) of a toilet because the water is clean and changes regularly. I didn’t do this.
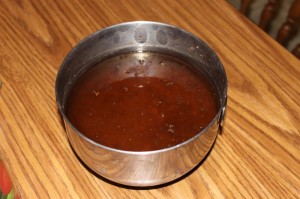
Water browned from tannis being leached out
The nutmeat was spread evenly onto a baking pan and I forced my wife to make pizza so I could use the “leftover” heat to dry the acorns. I think they were left in for too long as is evidenced through significany browning. They were almost a coffee roast, but smelled good.
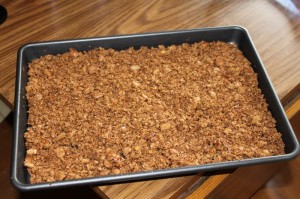
Wet acorn nutmeat before drying
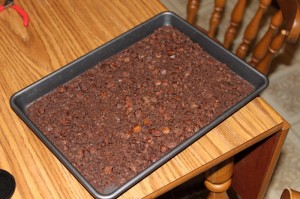
Oven-dried (and roasted) acorns
Ever the purist, I went the motar and pestle route to mill them. (Footnote: This inspired me to read about millstones, which are more fascinating than you think. Take a quick read about the patterns millstones cut with and how they are dressed. I thought they just pulverized, which they do not). After a laborious while, I had made a small bit of flour. Losing steam, I went to my coffee burr grinder and made quick work of the rest, grinding into a fine flour.
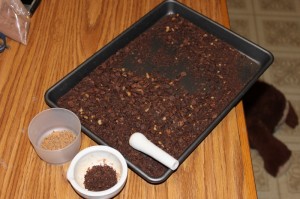
Milling the hard way - Mortar and Pestle
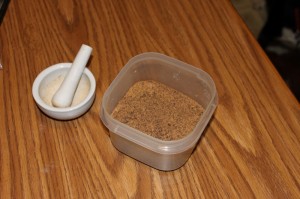
After milling the easy, and non-purist, way. Boo technoPhiles!
The last step was to make something edible. The flour tasted fine by itself. Somewhat bland
but with a nice nutty finish. My wife was kind enough to look up a “Traditional Acorn Flour” recipe for Acorn Muffins.
They turned out very dark and after a first taste they were…shall we say….harsh. It didn’t matter and I stubbornly gagged down the muffin, grinning in my self-sufficiency. The recipe did not call for butter nor sugar. I quickly topped them with sugar and ate one with butter. It was much better that way.

Sugar-topped acorn muffin
Nutrition Facts (from http://www.elook.org/nutrition/nuts/3218.html)
Serving Size: (100 grams)
Amount Per Serving
Calories: 501
% Daily Value*
Total Fat 30g 46%
Saturated Fat 4g 19%
Cholesterol 0mg 0%
Sodium 0mg 0%
Total Carboydrates 55g 18%
Dietary Fiber 0g ~
Sugars 0g ~
Protein 7g 14%
Vitamin A 1% Vitamin C 0%
Iron 6% Calcium 4%
So, my technoPhobe friends, this was a fine day. I have never really been a gardener or worked on a farm. I like most Americans get my food from the store. This was about finding a small amount of nutrition raining down in my front yard. It was more time and effort than I was expecting, but its encouraging to think that if I had to, I could survive a couple days by spending a bit of time under an oak. All the better if its mine…
Half Hour Halloween Hack
by Steve Struebing on Oct.30, 2009, under technoPHILE

Skull furious you have entered his space
Halloween came out of nowhere this year for me. I have not had the time to do much of anything having just moved into a new house, so I took it upon myself to quickly whip up something to get into the Halloween mood. I was at a local store and saw these little foam skulls for $1.50 and grabbed a couple. Its fun to see what can be made quickly, and now I have something to put outside when the trick-or-treaters arrive.
httpv://www.youtube.com/watch?v=HtpxKK6kfi4
The materials:
Parallax Infrared Motion Sensor #555-28027
ioBridge Control Module + Servo Smart Board (or arduino + motor shield, if preferred)
Hobbyist Servo
Resistor
Glue Gun
Mini-breadboard (I used my arduino protoshield from adafruit)
Some wire
2 Red Leds
Sharpie
Foam Skull
1 Sock (yeah, the hood is a black sock)
The object here was to simply make the skull do something when someone approached. I know this is FAR from original, but hey, I was pressed for time (and want to show that simple projects are really accessible to ANYONE) and didn’t want to do much planning. So, the project was born. I know I am not breaking any new ground here, but it didn’t detract from my bliss at annoying any co-worker who stepped in my office for the last 2 days. It did make the meetings more fun when the skull open his mouth to speak whenever a colleague would adjust their chair!
Steps:

Foam skull purchased for $1.50.
1- Took a saw to the lower jaw of the foam skull to detach it.

Lower jaw has been sawn off so it can be hinged
2- Bored 2 holes through the eye sockets out the back of the skull to run the LEDs and wires through

Bored 2 eyes into sockets to run LEDs into.

Testing that the LEDs are working and solder joints didn't break when inserting into skull.
3- Attached 2 long wires to the LED leads (drop of solder on each lead)
4- Whipped up a little rig for the servo and skull to sit on
5- Glue gunned lower jaw onto servo rig

Used glue gun to affix lower jaw.
6- Used sharpie to color in jaw (previously white because of styrofoam) and teeth.
7- Ran wires appropriately: (Digital Output – Eyes, Motion Sensor – Digital In, Servo Smartboard -Channel 1)
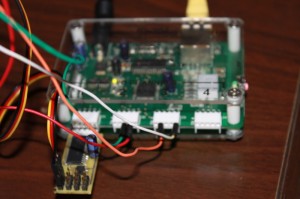
ioBridge wired up.
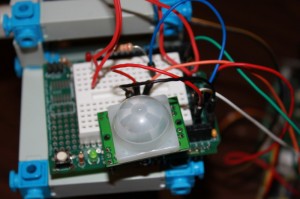
Parallax Infrared Motion Sensor #555-28027 on a protoshield from adafruit.
8- Set up messaging and triggers on ioBridge (or read digital input and write outputs if using arduino)
Note: I was actually unaware that the messaging and triggers for ioBridge were there, and they are easy to use (basically following the mantra of the platform). For an arduino, a simple read from the digitalIO and write to a PWM output using the servo library would do the trick, no problem!

Mouth closed.

Mouth opened.
9- Put sock over the skull

Skull with hood (not a gold-toe).
10- Annoy co-workers or greet tricker treaters.
HAPPY HALLOWEEN!
Solar-Powered Temperature Sensor
by Steve Struebing on May.18, 2009, under technoPHILE
Solar Powered Temperature Sensor
In case you’ve not heard, there is a Green Revolution in progress. To quote a popular commercial, “The way we use energy now can’t be the way we use it in the future. It’s not conservation, or wind, or solar. It’s all of it.” I have long kept a solar-energy project in the back of my mind, so I ordered a 12v/.2A solar panel power supply from a vendor (note: I erred while filming and said it is a 2A panel. It is a .2A panel). As a first step project, I figured I would power up my Arduino, use my shiny new XBee modules, and relay some sort of meaningful data back from this wireless solar-powered microprocessor.
httpv://www.youtube.com/watch?v=7A7coLAUyfQ
How is the weather outside today? If I am getting data, its sunny! And 65 degrees on my deck according to my newly built solar temperature probe.
XBee Communications
I did some first-steps using 2 Arduinos communicating over the default broadcast configurations over a span of about 2 feet.
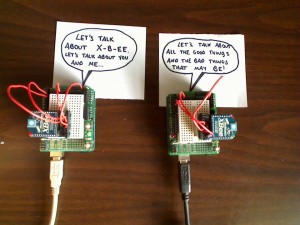
The Salt and Pepa of the Arduino world.
Arduino 1: “Yo. How you doing?”
Arduino 2: “Fine thanks. Wow, we are talking wirelessly.”
Arduino 1:” These are great days we’re living in, man.”
Arduino 2: “Now, if only I could unhook from this power cable.”
I settled down Arduino 2 after his diatribe likening himself to Pinnochio, and told him that I would take care of it.
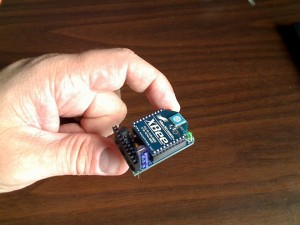
Detail of an XBee wireless communication module
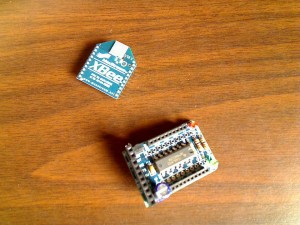
XBee Modem off of the adapter board
Serial Communications
After getting the Arduino twins talking (and hey, its all serial!) I grabbed my ioBridge and slapped on the Serial Communications smartboard. In about 1 minute, I had my ioBridge chatting with my Arduino. Sweet…. Now, on to untethering my Arduino. “I got no wires…to hold me down… la-la-la-la”
The Wireless Temperature Probe
I ran out to Radio Shack and picked up the right barrel plug adapter, and added some wires to run into the Arduino. Note: the jumper must be set on the Arduino to take power from external. My Solar Panel provides 12v, and the Arduino can take power up to 12v.
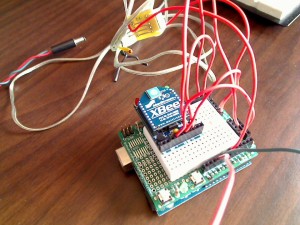
XBee hooked up to temperature sensor
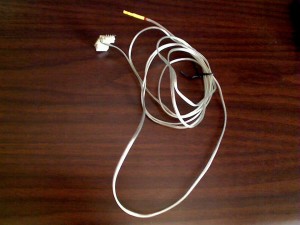
Temperature sensor
I used the temperature probe that I had from my ioBridge, crafted a quick sketch (see below) on the arduino (the analog scaling factor may be off since its not precisely linear, but c’est la vie) and waited for the sun. As soon as I plugged it in, the Arduino woke up, lights blinking, and was soon processing and wirelessly communicating! All this achieved because of energy provided by that flaming ball in the sky. Now that’s cool.
A quick run upstairs onto the ioBridge dashboard and guess what? The serial monitor widget was telling me what the temperature is outside. 65.31 degrees Farenheight. Wirelessly and without another power source…

ioBridge and Serial Smartboard hooked up to XBee module

A nice springlike 65 degrees outside at the moment.
Conclusion
Now that I have a solar powered wireless microprocessor at my disposal, I am thinking of giving it some legs, and onboarding some Artifical Intelligence. Its top priority could be to take over the world. Take some solace in the fact that the processor is 1KB of RAM, 512 bytes of EEPROM, and runs at a “blazing” 16 MHz. If that’s not enough, then know that all you need to do to shut down its diabolical scheme is stand over it and block the sun. Hmm. Perhaps its better served as a temperature probe….. for now…
Sketch for Arduino
#include <NewSoftSerial.h>

NewSoftSerial xBeeSerial =  NewSoftSerial(2, 3);

void setup()  {

  // Initialize the on-board LED

  pinMode(13, OUTPUT);

  //Initialize the HW serial port

  Serial.begin(9600);

  Serial.println("Ready to send data:");

  // set the data rate for the SoftwareSerial port

  xBeeSerial.begin(9600);

}

void loop()                     // run over and over again

{

  //Read from the analog input from analog pin 0

  int tempValue = analogRead(0);

  // Send the message to the XBEE Transmitter

  xBeeSerial.print("Time: ");

  xBeeSerial.print(millis());

  xBeeSerial.print(" Value:");

  // Do scaling ~6.875

  float scaledValue = tempValue / 6.875;

  xBeeSerial.print(scaledValue);

  xBeeSerial.print("\n");

 // Update every 2 seconds

 delay(2000);

}
This Just In: The World Loves Beer
by Steve Struebing on Mar.19, 2009, under technoPHILE
Serv O’Beer has found some interest online through being covered at Instructables, Engadget, Gizmodo, Make, and others. Of particular interest is its inclusion in the How 2.0 section of Popular Science April 2009 edition, and PopSci Online. Yeah, the 100,000 YouTube views are eyebrow-raising as well. We really appreciate all of the comments and suggestions, and those who laughed along with us at the “usefulness” of a machine that can pour us a REAL beer using an iPhone.
You can see that the v 2.0 Serv O’Beer has been plated for ridigity, and some additional braces added to provide for a more smooth pour. Also a high torque servo has been added to allow it to serve as a brake, rather than just a pushing arm, and then a brake (hence the high volume of head in the beer).
Again, thanks to everyone who has laughed, sat confused, rolled your eyes, or said “Dude, that is sweet. You need a better outlet for your spare time”. Mostly, the latter. Just a closing note: The servo and the ioBridge do the work, I just get to use my Construx for something again, and drink 3-4 beers trying to calibrate this sucker. Sounds like a win-win to me.
Check out the article in the April Issue of Popular Science.
Thanks again, everyone. I’ll pour one for you!
Tabletop Trebuchet
by Steve Struebing on Feb.11, 2009, under technoPHOBE
Tabletop Trebuchet
The trebuchet was a siege weapon with an interesting and complex history. Where some weapons employed torsion of ropes or sinews (such as the ballista, catapult, onager, espringal, etc) the trebuchet was a great advance as it used a massive counterweight to store the potential energy. Nowadays, these machines are used to throw pumpkins, cars, or just about anything. They are also the objects of much analysis for people trying to understand physics. This is an interesting and efficient throwing machine, so I had to build one. It has even recently been featured on Make.
While there are many kits out there and “right ways to build” a trebuchet, I wanted to simply go on illustrations from a book I had received for Christmas. Reverse Engineering, old school.
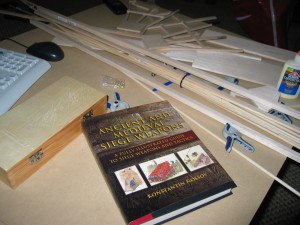
Armed with the tools of the trade, a book on the subject, and some time,it was time for a build.
Here is the workspace in my basement. The trebuchet was to be built from scratch using balsa, basswood, and some dowel rods.
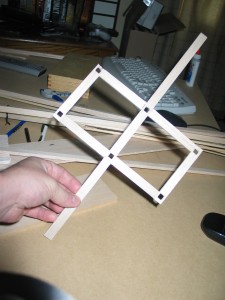
Built base. Notched 6 positions for frames using X-Acto knife. Also note lateral stabilizing arms.
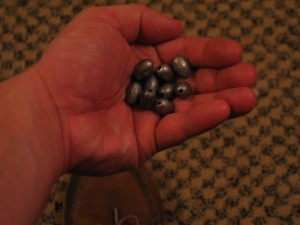
Counterweights- fishing sinkers
Building the Basket
This was one of the more “complex” parts of the build. The basket had specific shape requirements to keep the basket from flipping over, and had to hold a good amound of weight relative to the build material (balsa). Lastly, it could not dump the lead weight as it accelerated downwards.
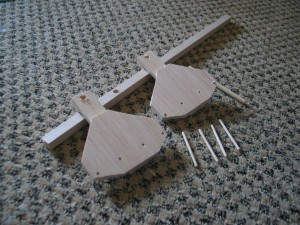
Basket parts and throwing arm pre-assembly
The two basket sides and the basswood throwing arm. Also 4 dowel rods are used to give additional support under the lead sinkers used as counterweight mass.
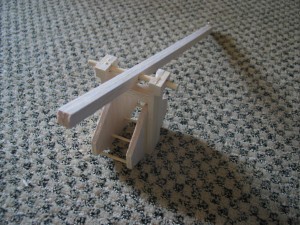
Built basket and arm.
Almost fully built basket. Need to add planking to the base so the lead won’t fall out. Also need some washers on the sides of the arm to minimize friction loss. The dowel pegs do add quite a bit of strength and stability.
Building the Frame
This was very derivative off what I saw the in my Ancient and Medeival Siege Weapons book. Its a rather simple A frame with some additional supports, but I added 2 basswood squares to stabilize the frame and give the throwing arm axle something firm to rotate through.
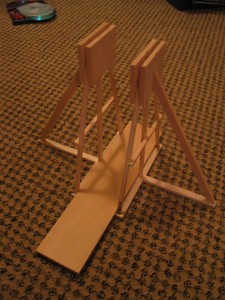
Build stand and throwing track.
The built up frame. Also note the flat track for the sling and projectile to slide with minimal friction as it accelerates. Here you can see the angled braces keeping the frame up (that were coming out of the sides of the base).
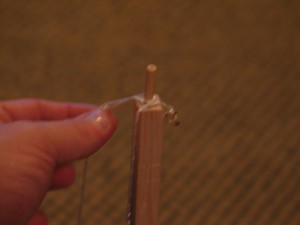
Sling release. This is a small dowel peg at the end of the throwing arm where one end of the sling is tied, and the other is looped over the peg to slide off at the proper point.
Detail of the sling. I screwed a small brass eyelet here to tie one end of the sling string to. The other has a simple tied loop, and is able to slide off as the sling angles around the throwing arm.
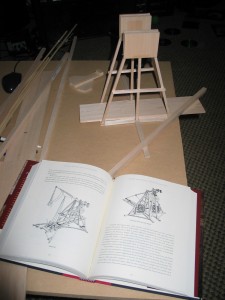
Illustration of the frame, and the book image used as the subject of some reverse engineering.
Take a look at the illustration. See any similarities? Ah, yes. The hamster wheels are missing. Those were used for men to wheel the heavy arm back down, and the counterweight back up. Real hamsters would be appropriate at this scale.
Ready, Aim, Fire
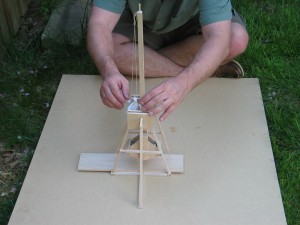
Trebuchet in resting (vertical) position. The counterweight is directly below the throwing arm at its lowest energy.
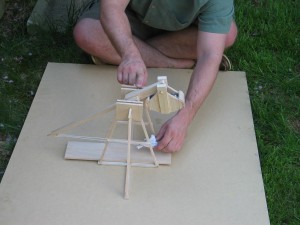
Trebuchet in loaded position. I am holding the sling with my left hand.
Conclusion
I really don’t know when I became interested in this neat little machine. I had stumbled upon The Grey Company’s Site, and their trials to build this class of tabletop trebs called “Cheese Chuckers”. There are sophisticated software packages that will allow you to run simulations to optimize your machine. Whether you want to build one to throw a car, or as I did, one to roll a die in a room at least 30 feet long, you can rest assured that your home is safer with one of these siege engines standing guard.
Arduino/ioBridge Airsoft Target Range
by Steve Struebing on Jan.20, 2009, under technoPHILE
Indoor Airsoft Shooting Range
httpv://www.youtube.com/watch?v=CL8V2lk75G4
A friend of mine who is something of an avid shooter had mentioned the lack of affordable “action” type targets. After some discussion, we determined it would be fun to build such a contraption for some indoor airsoft practice. The Arduino Diecimilia was a great choice for the “programming side” of things (I have 2 of them, he has one as well).
As a shooter, you would want to be up-range from the targets, so having something portable with a web interface was a great solution so nobody would have to be “in the line of fire”. The iPod Touch and the ioBridge module I used in another recent project. Of course, why build a custom target enclosure when I could snap one together with my Construx.

Victory! Let the fun start!
I used 3 of my hobby servos to turn the target faces. I am tightening the Construx frame to the hobby servo mount.
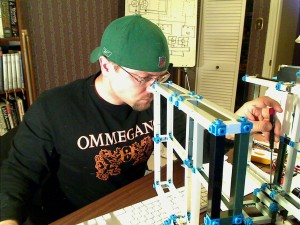
Building the target faces
Arduino Pin-Outs:
- Pin 13 – Debug LED
- Pin 12- Ready for Command
- Pin 11 – PWM for Servo 1
- Pin 10 – PWM for Servo 2
- Pin 9- PWM for Servo 3
- Pin 8- Incoming Command Pin (PWM from IOBridge)
- Pin 7- Command Waiting from IOBridge
- Pin 2- Peizo Speaker Control
Not to mention the ioBridge wiring, and the Servo wiring. Yeah I have a diagram or I would STILL be working on it.
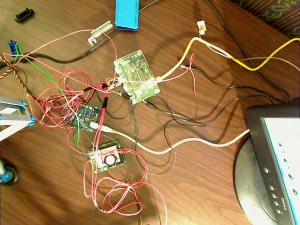
A rats nest of wires for the first pass
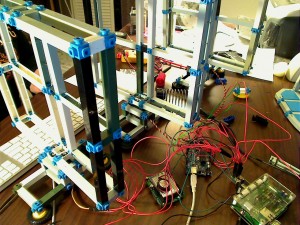
Debugging the system
It looks a monstrosity, but once the target face is on it, I cut up some cloth as the Airsoft BB trap, it will look just fine.

All done, ready to rock!
System debugged, targets turning! Now I can call out the programs remotely using the web browser in the iTouch and let the IOBrige tell the Arduino to do my bidding.
How the Airsoft Target Range Was Built
httpv://www.youtube.com/watch?v=Ww8qHa7d3Mw
Arduino Source Code: Arduino-ioBridge-Airsoft-Source-Code.txt
I would say this was a fun, interesting, and rewarding project. I have also made it future-proof enough to scale up the number of targets for even more options. For those of you airsofters who don’t want your skills to dull over the winter, turn your basement into a range!
Now, should I put hay-bales on a servo platform for an indoor archery range?
Happy tinkering!
Full Video Version (Combined Demo + Instructions)
httpv://www.youtube.com/watch?v=LpXecFOMGCk

