technoPHILE
3-D Printing: Thought to Thing at Lightspeed
by Steve Struebing on Oct.07, 2012, under technoPHILE
Intro
Imagine a world where anytime you needed an item, you would just download a drawing of the thing from the web, or draw it yourself, feed it into a machine, and you’d have it. Well, we’re just about there (within reason of complexity and materials).
For several years a revolution in prototyping/manufacturing has been going on through various techniques of 3-D Printing. That name is often confusing to people who quickly envision printing 3-D images (needing 3-D glasses) with a 2-D printer. While that may be cool, this is way cooler. Way, way, cooler. This is 3-D building. I will continue to call it printing, but it’s actually building up the object so you finish with a tangible REAL item.
The machines needed in years prior required big dollars and were relegated to corporations and individuals like Tony Stark (that’s Iron Man, for those whose fingers may be off the pulse of contemporary films). Hobbyists had also been hacking away to bring this technology into their garages.
A while back, some of my friends and I attended a build session at HacDC for a machine called a RepRap. <tangent>This is a 3-D Printer whose intent is to eventually print itself. Collect the pieces of your brain off the floor and walls and come back to me </tangent>. It seemed that the 3-D hobby space was coming a long way…and fast.
Disclaimer: I am going to try to keep this whole deal simple for beginners. I am not going to talk about support material and overhangs, talk about stepper motors, etc.
Simple Concept: This is not like starting with a block of something like wood and carving, filing, or drilling it out to shape it. That is a subtractive process. This is an ADDITIVE process: building up. The 3-D printer I will be discussing heats up a string of ABS plastic (stuff LEGOs are made of) and pushes it through a little nozzle (fancy name: extruder). 3 motors put the nozzle in the right place (one motor per axis: X, Y, and that glorious new Z). Now, how the hell does it do that? I am going to take a liberty that some people will flag me on, but this is for beginners. You know when you hold a relaxed slinky and it is a cylinder? If it had a base under it then you would have a leaky cup, right? BUT, when you uncoil it, it’s a long string of plastic. That’s kind of how it works. (Note: the 3-D printed cups don’t leak though)
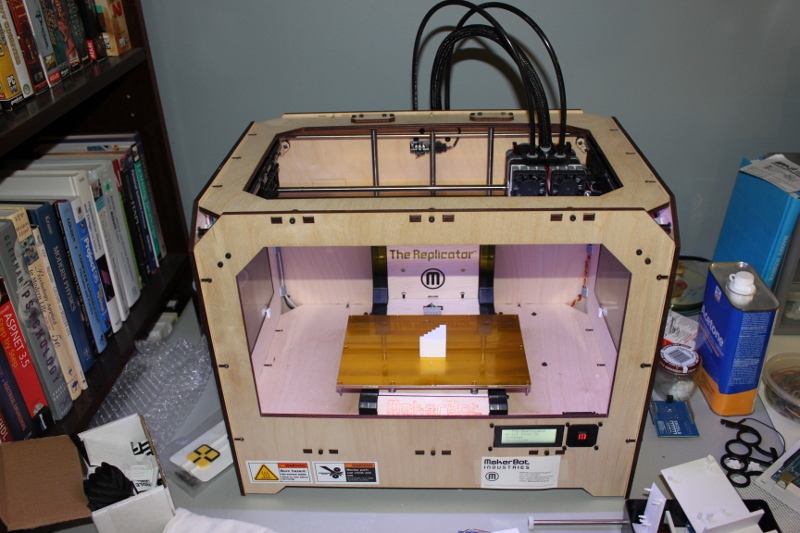
When MakerBot industries released their 3rd generation 3-D printer the Replicator, it was go time for this hacker. By the way, this was funded by some of the proceeds of the HALO project (thanks again Humana and Instructables.com!!!)
Making a 3D Model:
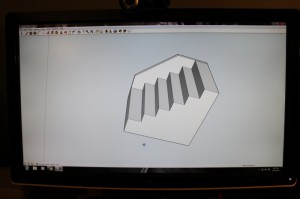
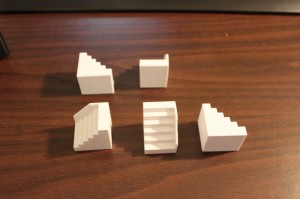
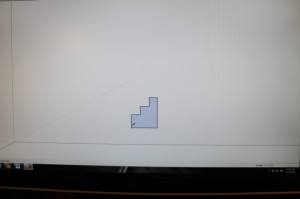
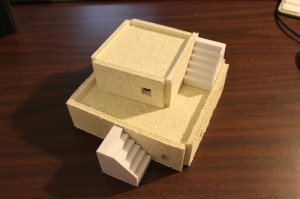
I am going to take you through the process of making a scale staircase for my model cities I have put in previous posts. Making them through other means was a major pain!
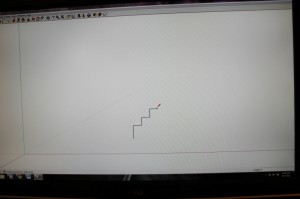
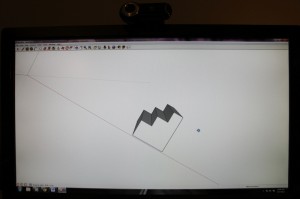
Just like virtually every other aspect of this stuff, 3D Modelling is a topic in and of itself. There are many tool alternatives out there. I use SketchUp (used it to model my basement, logos, and of course stuff to print). It consists of creating a series of lines, called “edges”. Once these edges create a closed shape, you’ve created a “face”. Point A->B is a line (edge). Point B->C is now an angle (or a line with a hinge) Point C->back to A. TRIANGLE…et voila! A close shape also known as a “Face.”
Once you have a “face”, you can push or pull it in the tool to make an object of depth. Like if I took a circle and it left a trail in the air, if I lifted it straight up, it would make a cylinder. You can then export the 3D model into a file format called a .STL file (note: using an external plugin you will have to install). I see your eyes closing… Look, all those points we made to describe edges and faces are captured into a file as x,y,z positions.
3-D Model into Tool Commands:
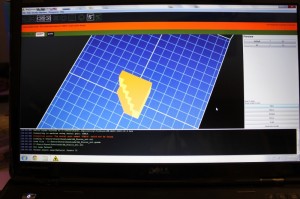
The tool software for my machine (ReplicatorG) takes the 3-D STL model and starts generating the way the extruder should move to make that object (starting from the bottom up).
It “slices” that model up into thousands of 2-D cross-sections. Like if I were to take a cross-section of an orange at the base, it would be a small circle. In the midpoint, a large circle, and as I approach the top, smaller and smaller circles. This is what is going to be printed. These concentric circles in our orange case are what the extruder is going to lay down in plastic through a “go from here to there” language called G-Code.
Example of this somewhat cryptic stuff:
M103 (disable RPM) M73 P0 (enable build progress) G21 (set units to mm) G90 (set positioning to absolute) G10 P1 X0 Y0 Z0 (Designate T0 Offset) G10 P2 X33 Y0 Z0 (Designate T1 Offset) M109 S110 T1 (set HBP temperature) M104 S220 T1 (set extruder temperature) (temp updated by printOMatic) G55 (Recall offset cooridinate system) G1 X-2.0 Y13.65 Z0.14 F3360.0G1 F1200.0 G1 E11.53 G1 F3360.0 M101 G1 X-2.0 Y27.82 Z0.14 F2214.0 E12.145 G1 X-1.6 Y28.22 Z0.14 F2214.0 E12.17G-Code to Object
The Replicator heats up to the prescribed temperature based on the material to be used (again, its ABS LEGO-stuff plastic). Following the G-Code “go from here to there” instructions, it lays down the plastic on the build platform creating the bottom of the object. Once the first layer is done, the machine drops the platform down just a teensy bit, and does the next layer…and again..and again.. and we’re building up an OBJECT IN 3-D!!!!!!
Object
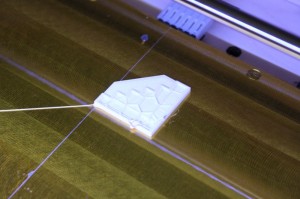
The machine does not necessarily fill in the whole object. You can configure it to just lay in a honeycomb pattern so you still get rigidity and use less material.
Once the build is complete, you can pop it off the build platform, and you’re holding a REAL, 3-D durable plastic object. There is a website called Thingiverse where tons and tons of items are free for download and where you can contribute your models back to the world.
Summary:
The awesomeness of this fabrication technology cannot be overstated. For a prototyper/tinkerer like me, it’s like having access to splitting an atom. It’s a game changer. It’s the future in all of its promise and peril. As you let your mind run out to future states you can envision custom-fabricated limb-replacements on demand, or armies of printing robots reproducing and taking over the globe. We’ll see where we end up, but either way, this is some fascinating technology. Now, time to go install that coat hook by the door. Oh wait, I have to print it first…
JUNKies: Beer Fridge Build
by Steve Struebing on Oct.16, 2011, under technoPHILE
After enjoying major success with his Beer Fridge in Popular Science, The Graham Norton Show, and on YouTube, I had the good fortune to meet Ryan Rusnak and found he was also living in NOVA (that’s Northern Virginia, to all you SOVA’s, and others). He was approached by the production company for JUNKies which was airing on The Science Channel. They wanted a beer fridge, but bigger and better. Ryan was kind enough to ask Jay@TheCapacity and I if we wanted to help prep/prototype a build he would be doing at Jimmy’s Junkyard for the show. We were happy to oblige!
Hovercrash
Premiere: Thursday, September 8 at 10PM e/p
At Jimmy’s Junk two inventors need help turning a fridge into a beer launcher, and Hale lands himself in hot water. Later a high school class’s hopes may go crashing into a watery grave when they ask Jimmy to come up with an engine for their hovercraft.
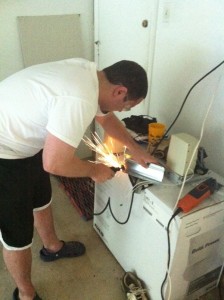
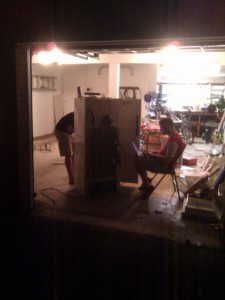
THE PREP
THE SHOW
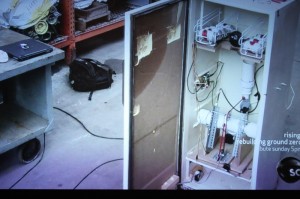
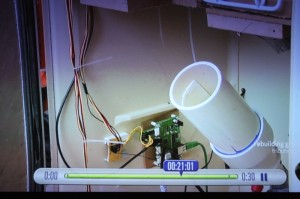
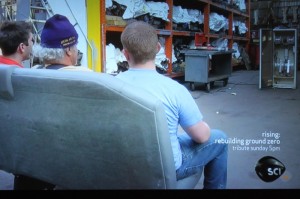
Here are shots from the airing on The Science Channel. How Ryan and Josh got everything integrated in Jimmy’s Junkyard, and used stuff from the yard to make it work is nothing short of a miracle! I can confirm it involved coding in the car, and one very tired Ryan driving up to New York.

Jimmy preparing to fire. Josh is thinking: "Please don't crash, software", and Ryan hoping the PSI is not going to kill Jimmy.
This build was a lot of fun, but reinforces several of lifes important rules:
1- Never send 4 software engineers to do a Mechanical Engineer’s job
2- Never send 4 software engineers to do an Electrical Engineer’s job
3- Whatever your estimates are for working out the motors/mechanical and getting into “just software”: Multiply them by at least 3.14159 (thank “Making things Move” for that observation)
4- When an air cannon with too much PSI goes off at 2am in your neighborhood and sounds like the Horn of Gondor, and nobody complains, you know you’ve got good neighbors (thanks Ken, and Jeff).
5- Building things together is a hell of a lot of fun.
6- Rule 5 is all that matters.
Thanks to Ryan for roping me and Jay@TheCapacity into this build. My dremmel was collecting dust, and my garage needed to be turned into a lab for a little while.
WUSA9: Super NOVA Writeup on HALO Project
by Steve Struebing on Jun.27, 2011, under technoPHILE
I was recently written up in WSA9’s weekly highlight for a local person who has an interesting hobby, has made a business impact, is a philanthropist, …..or who can provide any content for them to meet a deadline. My thanks to Ryan Rusnak for nominating me as a Super NOVA, and Ellen Scott for interviewing me and posting the article.
Post your best caption for this awkward cutscene shot below in comments 🙂
Link to Article
http://annandale.wusa9.com/news/news/super-nova-innovative-spirit-annandale-resident-builds-device-aid-blind/57964
.
Collaboration: An Art and a Science
by Steve Struebing on Apr.16, 2011, under technoPHILE
In my day job, I manage an engineering team and have always valued usability in the products we craft. Usability is a broad term. I use it to encompass the ease of use but also the approachability of a product. The design of a thing really can make an experience pleasant or frustrating.
As engineers we can create the function, shuttle bits and bytes down the wires in an orchestra of logic, model the forces at play, but often create a product cold to the touch and to the eye. Artists and designers, by contrast, can create something that calls out to be interacted with, that evokes an emotional response, and a lasting connection to a product. However, artists are not always trained in microcontrollers and physics.
In recent travels to North Carolina and Lexington Kentucky, I was amazed at some of the kinetic sculptures and ceiling fans designed in their airports. Many engineers could create the motion, but could not easily create the experience that caused me to smile, to ponder, to stop and admire the work. That is what an artist did, and this is why the world needs collaborations of artists and engineers.
(Courtesy Jeremy Stern: www.jeremysternart.com)
Our Collaboration
I was contacted by artist Jeremy Stern who had seen my motion-feedback instructables.com project towards the end of last year. He was planning an installation for his Masters in Fine Arts that would, if possible, incorporate an element I had used in my project. He reached out for assistance, and I was thrilled to help.
Products such as ioBridge and Arduino make technology available to everyone as a language in which to voice their creativity. It just takes a little time from someone who has done it before. It helps when there are engineers who can show that the concepts are not intimidating, just the words may be. It’s not “analog and digital”, think of it as a light switch vs. a dimmer. It’s not binary 0 and 1 and how many bits, its how many combinations of heads and tails you can have with a couple pennies. By the end of the project a soldering, wiring artist had been let loose.
“Response to the project was extremely positive, and many agreed that the water and traffic portions were the most noticeable in terms of how their movements corresponded with playback. Thanks again for all your help, Steve, working with you was definitely one of the highlights of the entire project for me.”
Jeremy and I worked several times via email and over video chat and put together a design that would function for a portion of the audio elements for his project. I would like to congratulate him on his successful project “Following”, and subsequent award of Outstanding Graduating Graduate Student from UNR. Perhaps some time he’ll encounter an tinkerer/engineer who really needs help bringing her metal and plastic construction to creative life in a way that will ignite a users imagination. Perhaps he will use his considerable eye and creativity to make that happen in a future collaboration. We engineers need help from artists like Jeremy.
“Following”
“Video documentation of different visitors to the Sheppard Fine Arts Gallery, at the University of Nevada, Reno, interacting with an artwork entitled “In Concert,” as part of Jeremy Stern’s MFA thesis exhibition, “Following,” on view March 7 – 11, 2011. This exhibition explored the reconciliation of personal experience with mapped information by using the gallery’s own systems (cameras, 4-channel ceiling-mounted speakers, ceramic tile floor, hidden door, and lights) to transform the place of the gallery into an impression of the space of Reno/Sparks through a sampling and live mixing of site-specific sounds.
“In Concert” utilized two systems to measure visitor movement through the entire gallery space and play back sounds of the larger Reno/Sparks environment in which the gallery also sits. One system, co-developed with Steve Struebing of www.polymythic.com, used 3 PIR sensors per device to trigger changes in environmental sounds through an Arduino controlled mp3 player. Two devices were active in this system: one that controlled water flow of the Truckee River where normally loud sound diminished with increased movement along the sensors’ range; and another that increased the normally diminished sounds of auto traffic with increased movement along the sensors.
The second system, Eyecon, used 4 computers, each with a webcam pointed at the gallery’s 8-channel security monitor, whose cameras were angled at the grid of the gallery’s ceramic tile floor. The 8 x 12 square grid was transposed onto a Rand McNally road map of Reno/Sparks, and site specific sounds were gathered from locations on that map, within that grid. Using Eyecon, these site-specific recordings were programmed to drop down over top of anyone entering the view of the security cameras through the gallery’s 4-channel, 8-speaker sound system. The result was that visitors walking across the gallery became literal giants in the Reno/Sparks landscape, and based on how slow or fast they moved through a tile/mapped space, one might hear a brief clip or a lengthy environmental recording identifying that abstract sound as a specific location.
This work was collaboratively made with Anthony Alston, Joseph DeLappe and the Digital Media Department of UNR, Greg Gartella, Shelly Goodin, Audrey Love, Jean-Paul Perrotte, Clint Sleeper and Frieder Weiss.”
Humana Health by Design Challenge – HALO Project Results
by Steve Struebing on Feb.09, 2011, under technoPHILE
The results were published, and I am honored to have won the Assistive Tech Grand Prize. I would like to thank everyone for voting at www.instructables.com. I would like to say a big thank you to Humana for hosting the competition, and congratulations to everyone else who entered. There were some spectacular entries, especially in the area of Autism. Right in line with my interests, both high and low tech demonstrated innovative thinking.
Excerpt from Post:
“The Grand Prize for Assistive Technology went to Steve Struebing from Annandale, Va., for his Haptic Assisted Locating of Obstacles, or Project HALO. Struebing used simple sensors and vibrating motors to help people with reduced vision identify and avoid obstacles, and navigate the world more safely.”
“Humana is thrilled with the responses of so many individuals who offered well-being innovations on Instructables.com,” said Raja Rajamannar, chief innovation and marketing officer for Humana. “The many entries we received were excellent examples of how individual ingenuity can enhance health and well-being for people facing challenges.”
Thank you to the judges of the competition, who are as follows:
- Saul Griffith, PhD – 2007 MacArthur Award recipient, winner of multiple inventor awards
- Matt Herper – senior editor at Forbes magazine, covering medicine and science
- Joan Kelly– director of well-being and innovation, Humana
- Quinn Norton – freelance journalist covering science, technology and medicine
- Aaron Rulseh, MD – editor at Medgadget.com
- Kelly Traver, MD – founder, Healthiest You; author; former medical director, Google
- Tyghe Trimble – online editor, Popular Mechanics
- Eric Wilhelm, PhD – winner of multiple inventor awards, founder/CEO of Instructables
HALO – Haptic Feedback System for Blind/Visually Impaired
by Steve Struebing on Dec.12, 2010, under technoPHILE
Complete Build Instructions:
Please visit www.instructables.com for the complete build instructions and story.
httpv://www.youtube.com/watch?v=hfXs5rhwCfE
Highlights/Features
– Approximate 4 feet of range
– Variable haptic sensation (frequency and intensity of vibrations increase as range decreases)
– Just over 180 degree field of view from 5 Parallax Ping))) Ultrasonic Rangefinders
Background
I have recently been introduced to some new and interesting people with passions for ideas and a belief that our power to be creative with technologies can really make a difference in the world. I used this as a springboard to create the H.A.L.O. This stands for Haptic (meaning touch) Assisted Location of Obstacles. I had watched an episode of “Superhumans” which featured a blind man who used a series of clicks, like a bat, to echo locate his surroundings. I got to thinking about other blind people and their ability to navigate freely – perhaps without the use of a guide dog or cane.
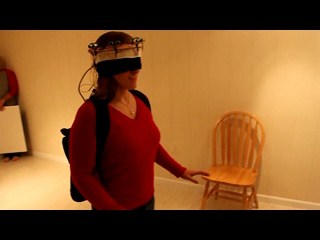
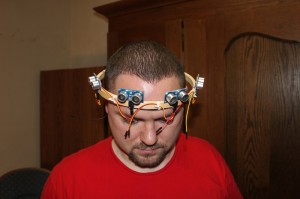
The solution uses a series of rangefinders that take input from sensors and output feedback to pulse vibration motors placed on a person’s head. As a person gets closer to an object the intensity and frequency of the vibration increases – it’s directly proportional to the distance of an object. If a region was lacking feedback, then it is safe to proceed in that direction.
Perhaps this can be useful for the visually impaired to have the freedom to possibly move about hands-free without the assistance of a cane or seeing eye dog, or serve as a complementary enhancement to those solutions. Technology has undoubtedly made our daily lives better. By using a few inexpensive components and sensors, I’ve made a device that will allow the blind to navigate their surroundings and avoid collisions.
Great posts and comments over at:
http://hackaday.com/2010/12/17/haptic-feedback-for-the-blind/#comments
http://walyou.com/haptic-assistance-for-the-blind/
http://blog.makezine.com/archive/2010/12/project_halo_helps_you_navigate_wit.html
Photos
Motion Feedback MP3 Trigger
by Steve Struebing on Apr.07, 2010, under technoPHILE
I posted over at Instructables a project that uses the Parallax PIR Motion Sensor (yes, it IS that same I used in the Halloween Hack, ye of the clan Observant) to encourage me to be working out. If I am, then I am rewarded with some tunes to keep moving along. However, if I am lazy and take a breather…well….. “No Snoop For You!”
The Parts List:
- SparkFun MP3 Trigger
- IO-204 Control Module
- Parallax PIR Motion Sensor
- PC Speakers
- Coffee Tin
- Drill
- 6xMachine Screws, and 12xNuts
Key objectives here:
- Try out the SparkFun MP3 Trigger
- Finally get a project into an enclosure that I think will be good for other people’s projects (this could be the next Altoids contender?)
- Delve into “Onboard Rules” functions of the IO-204 while offline
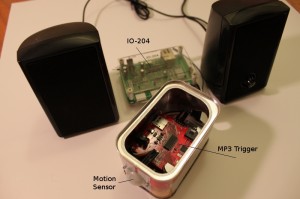
If you want more details, head over to the Instructables post.
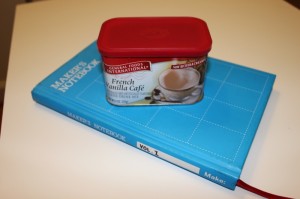
Here is the project enclosure. Admit it, you love you some Maker’s Notebook, too, don’t you? The MP3 Trigger sits snug as a bug in a rug with the machine screws and nuts anchoring it in place. 2 additional ones hold the PIR Motion Sensor to the front of the tin. Getting the larger hole in the front and back was tricky because I did not have a great pair of snips around. I’ll know for next time! I did manage to wear through several Dremmel bit tips in my stubbornness of using the wrong tool for the job.
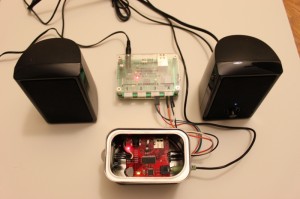
Here she be all wired up. Note, she AIN’T wired to the LAN, so this is using the “Onboard Rules” feature. If I did want to datalog the session, I would have to plug in to my router (which in this case really is not more than 10 feet away).
Half Hour Halloween Hack
by Steve Struebing on Oct.30, 2009, under technoPHILE

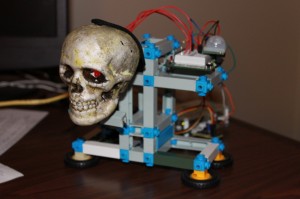
Skull furious you have entered his space
Halloween came out of nowhere this year for me. I have not had the time to do much of anything having just moved into a new house, so I took it upon myself to quickly whip up something to get into the Halloween mood. I was at a local store and saw these little foam skulls for $1.50 and grabbed a couple. Its fun to see what can be made quickly, and now I have something to put outside when the trick-or-treaters arrive.
httpv://www.youtube.com/watch?v=HtpxKK6kfi4
The materials:
Parallax Infrared Motion Sensor #555-28027
ioBridge Control Module + Servo Smart Board (or arduino + motor shield, if preferred)
Hobbyist Servo
Resistor
Glue Gun
Mini-breadboard (I used my arduino protoshield from adafruit)
Some wire
2 Red Leds
Sharpie
Foam Skull
1 Sock (yeah, the hood is a black sock)
The object here was to simply make the skull do something when someone approached. I know this is FAR from original, but hey, I was pressed for time (and want to show that simple projects are really accessible to ANYONE) and didn’t want to do much planning. So, the project was born. I know I am not breaking any new ground here, but it didn’t detract from my bliss at annoying any co-worker who stepped in my office for the last 2 days. It did make the meetings more fun when the skull open his mouth to speak whenever a colleague would adjust their chair!
Steps:

Foam skull purchased for $1.50.
1- Took a saw to the lower jaw of the foam skull to detach it.

Lower jaw has been sawn off so it can be hinged
2- Bored 2 holes through the eye sockets out the back of the skull to run the LEDs and wires through

Bored 2 eyes into sockets to run LEDs into.

Testing that the LEDs are working and solder joints didn't break when inserting into skull.
3- Attached 2 long wires to the LED leads (drop of solder on each lead)
4- Whipped up a little rig for the servo and skull to sit on
5- Glue gunned lower jaw onto servo rig

Used glue gun to affix lower jaw.
6- Used sharpie to color in jaw (previously white because of styrofoam) and teeth.
7- Ran wires appropriately: (Digital Output – Eyes, Motion Sensor – Digital In, Servo Smartboard -Channel 1)
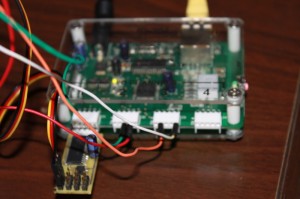
ioBridge wired up.
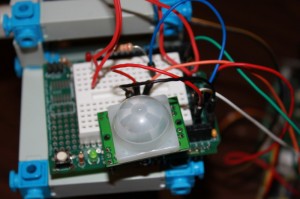
Parallax Infrared Motion Sensor #555-28027 on a protoshield from adafruit.
8- Set up messaging and triggers on ioBridge (or read digital input and write outputs if using arduino)
Note: I was actually unaware that the messaging and triggers for ioBridge were there, and they are easy to use (basically following the mantra of the platform). For an arduino, a simple read from the digitalIO and write to a PWM output using the servo library would do the trick, no problem!
Mouth closed.

Mouth opened.
9- Put sock over the skull

Skull with hood (not a gold-toe).
10- Annoy co-workers or greet tricker treaters.
HAPPY HALLOWEEN!
Solar-Powered Temperature Sensor
by Steve Struebing on May.18, 2009, under technoPHILE
Solar Powered Temperature Sensor
In case you’ve not heard, there is a Green Revolution in progress. To quote a popular commercial, “The way we use energy now can’t be the way we use it in the future. It’s not conservation, or wind, or solar. It’s all of it.” I have long kept a solar-energy project in the back of my mind, so I ordered a 12v/.2A solar panel power supply from a vendor (note: I erred while filming and said it is a 2A panel. It is a .2A panel). As a first step project, I figured I would power up my Arduino, use my shiny new XBee modules, and relay some sort of meaningful data back from this wireless solar-powered microprocessor.
httpv://www.youtube.com/watch?v=7A7coLAUyfQ
How is the weather outside today? If I am getting data, its sunny! And 65 degrees on my deck according to my newly built solar temperature probe.
XBee Communications
I did some first-steps using 2 Arduinos communicating over the default broadcast configurations over a span of about 2 feet.
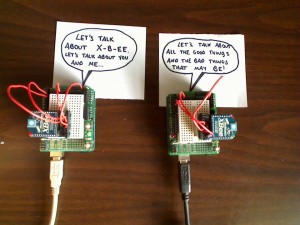
The Salt and Pepa of the Arduino world.
Arduino 1: “Yo. How you doing?”
Arduino 2: “Fine thanks. Wow, we are talking wirelessly.”
Arduino 1:” These are great days we’re living in, man.”
Arduino 2: “Now, if only I could unhook from this power cable.”
I settled down Arduino 2 after his diatribe likening himself to Pinnochio, and told him that I would take care of it.
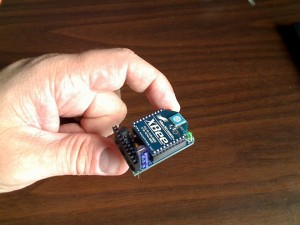
Detail of an XBee wireless communication module
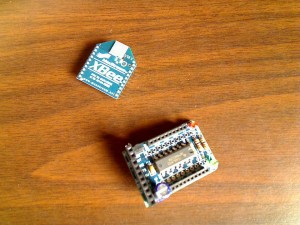
XBee Modem off of the adapter board
Serial Communications
After getting the Arduino twins talking (and hey, its all serial!) I grabbed my ioBridge and slapped on the Serial Communications smartboard. In about 1 minute, I had my ioBridge chatting with my Arduino. Sweet…. Now, on to untethering my Arduino. “I got no wires…to hold me down… la-la-la-la”
The Wireless Temperature Probe
I ran out to Radio Shack and picked up the right barrel plug adapter, and added some wires to run into the Arduino. Note: the jumper must be set on the Arduino to take power from external. My Solar Panel provides 12v, and the Arduino can take power up to 12v.
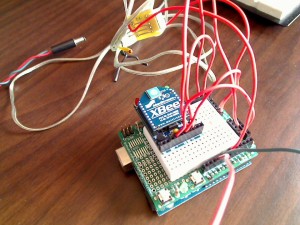
XBee hooked up to temperature sensor
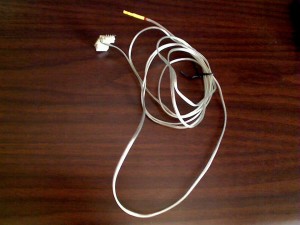
Temperature sensor
I used the temperature probe that I had from my ioBridge, crafted a quick sketch (see below) on the arduino (the analog scaling factor may be off since its not precisely linear, but c’est la vie) and waited for the sun. As soon as I plugged it in, the Arduino woke up, lights blinking, and was soon processing and wirelessly communicating! All this achieved because of energy provided by that flaming ball in the sky. Now that’s cool.
A quick run upstairs onto the ioBridge dashboard and guess what? The serial monitor widget was telling me what the temperature is outside. 65.31 degrees Farenheight. Wirelessly and without another power source…
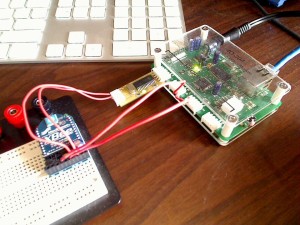
ioBridge and Serial Smartboard hooked up to XBee module
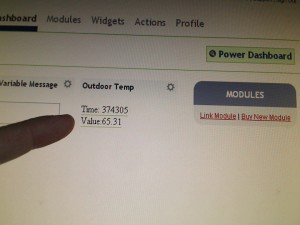
A nice springlike 65 degrees outside at the moment.
Conclusion
Now that I have a solar powered wireless microprocessor at my disposal, I am thinking of giving it some legs, and onboarding some Artifical Intelligence. Its top priority could be to take over the world. Take some solace in the fact that the processor is 1KB of RAM, 512 bytes of EEPROM, and runs at a “blazing” 16 MHz. If that’s not enough, then know that all you need to do to shut down its diabolical scheme is stand over it and block the sun. Hmm. Perhaps its better served as a temperature probe….. for now…
Sketch for Arduino
#include <NewSoftSerial.h>

NewSoftSerial xBeeSerial =  NewSoftSerial(2, 3);

void setup()  {

  // Initialize the on-board LED

  pinMode(13, OUTPUT);

  //Initialize the HW serial port

  Serial.begin(9600);

  Serial.println("Ready to send data:");

  // set the data rate for the SoftwareSerial port

  xBeeSerial.begin(9600);

}

void loop()                     // run over and over again

{

  //Read from the analog input from analog pin 0

  int tempValue = analogRead(0);

  // Send the message to the XBEE Transmitter

  xBeeSerial.print("Time: ");

  xBeeSerial.print(millis());

  xBeeSerial.print(" Value:");

  // Do scaling ~6.875

  float scaledValue = tempValue / 6.875;

  xBeeSerial.print(scaledValue);

  xBeeSerial.print("\n");

 // Update every 2 seconds

 delay(2000);

}
This Just In: The World Loves Beer
by Steve Struebing on Mar.19, 2009, under technoPHILE
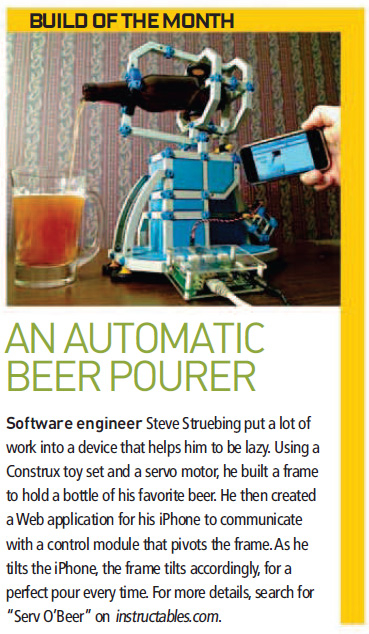
Serv O’Beer has found some interest online through being covered at Instructables, Engadget, Gizmodo, Make, and others. Of particular interest is its inclusion in the How 2.0 section of Popular Science April 2009 edition, and PopSci Online. Yeah, the 100,000 YouTube views are eyebrow-raising as well. We really appreciate all of the comments and suggestions, and those who laughed along with us at the “usefulness” of a machine that can pour us a REAL beer using an iPhone.
You can see that the v 2.0 Serv O’Beer has been plated for ridigity, and some additional braces added to provide for a more smooth pour. Also a high torque servo has been added to allow it to serve as a brake, rather than just a pushing arm, and then a brake (hence the high volume of head in the beer).
Again, thanks to everyone who has laughed, sat confused, rolled your eyes, or said “Dude, that is sweet. You need a better outlet for your spare time”. Mostly, the latter. Just a closing note: The servo and the ioBridge do the work, I just get to use my Construx for something again, and drink 3-4 beers trying to calibrate this sucker. Sounds like a win-win to me.
Check out the article in the April Issue of Popular Science.
Thanks again, everyone. I’ll pour one for you!

