Tag: sensor
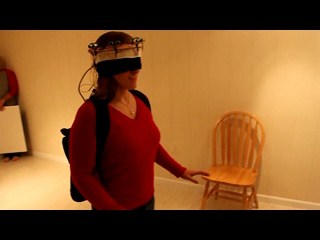
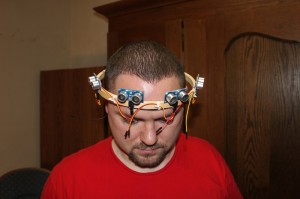
HALO – Haptic Feedback System for Blind/Visually Impaired
by Steve Struebing on Dec.12, 2010, under technoPHILE
Complete Build Instructions:
Please visit www.instructables.com for the complete build instructions and story.
httpv://www.youtube.com/watch?v=hfXs5rhwCfE
Highlights/Features
– Approximate 4 feet of range
– Variable haptic sensation (frequency and intensity of vibrations increase as range decreases)
– Just over 180 degree field of view from 5 Parallax Ping))) Ultrasonic Rangefinders
Background
I have recently been introduced to some new and interesting people with passions for ideas and a belief that our power to be creative with technologies can really make a difference in the world. I used this as a springboard to create the H.A.L.O. This stands for Haptic (meaning touch) Assisted Location of Obstacles. I had watched an episode of “Superhumans” which featured a blind man who used a series of clicks, like a bat, to echo locate his surroundings. I got to thinking about other blind people and their ability to navigate freely – perhaps without the use of a guide dog or cane.
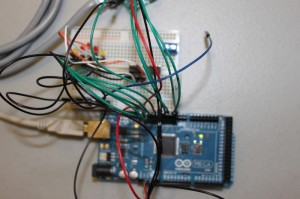
The solution uses a series of rangefinders that take input from sensors and output feedback to pulse vibration motors placed on a person’s head. As a person gets closer to an object the intensity and frequency of the vibration increases – it’s directly proportional to the distance of an object. If a region was lacking feedback, then it is safe to proceed in that direction.
Perhaps this can be useful for the visually impaired to have the freedom to possibly move about hands-free without the assistance of a cane or seeing eye dog, or serve as a complementary enhancement to those solutions. Technology has undoubtedly made our daily lives better. By using a few inexpensive components and sensors, I’ve made a device that will allow the blind to navigate their surroundings and avoid collisions.
Great posts and comments over at:
http://hackaday.com/2010/12/17/haptic-feedback-for-the-blind/#comments
http://walyou.com/haptic-assistance-for-the-blind/
http://blog.makezine.com/archive/2010/12/project_halo_helps_you_navigate_wit.html
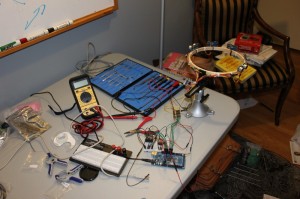
Photos
Motion Feedback MP3 Trigger
by Steve Struebing on Apr.07, 2010, under technoPHILE
I posted over at Instructables a project that uses the Parallax PIR Motion Sensor (yes, it IS that same I used in the Halloween Hack, ye of the clan Observant) to encourage me to be working out. If I am, then I am rewarded with some tunes to keep moving along. However, if I am lazy and take a breather…well….. “No Snoop For You!”
The Parts List:
- SparkFun MP3 Trigger
- IO-204 Control Module
- Parallax PIR Motion Sensor
- PC Speakers
- Coffee Tin
- Drill
- 6xMachine Screws, and 12xNuts
Key objectives here:
- Try out the SparkFun MP3 Trigger
- Finally get a project into an enclosure that I think will be good for other people’s projects (this could be the next Altoids contender?)
- Delve into “Onboard Rules” functions of the IO-204 while offline
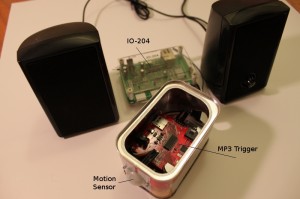
If you want more details, head over to the Instructables post.
Here is the project enclosure. Admit it, you love you some Maker’s Notebook, too, don’t you? The MP3 Trigger sits snug as a bug in a rug with the machine screws and nuts anchoring it in place. 2 additional ones hold the PIR Motion Sensor to the front of the tin. Getting the larger hole in the front and back was tricky because I did not have a great pair of snips around. I’ll know for next time! I did manage to wear through several Dremmel bit tips in my stubbornness of using the wrong tool for the job.

Here she be all wired up. Note, she AIN’T wired to the LAN, so this is using the “Onboard Rules” feature. If I did want to datalog the session, I would have to plug in to my router (which in this case really is not more than 10 feet away).
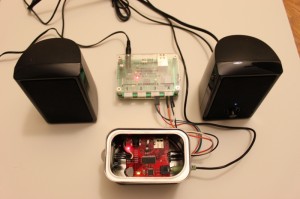
Half Hour Halloween Hack
by Steve Struebing on Oct.30, 2009, under technoPHILE

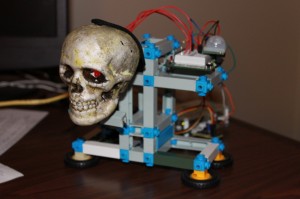
Skull furious you have entered his space
Halloween came out of nowhere this year for me. I have not had the time to do much of anything having just moved into a new house, so I took it upon myself to quickly whip up something to get into the Halloween mood. I was at a local store and saw these little foam skulls for $1.50 and grabbed a couple. Its fun to see what can be made quickly, and now I have something to put outside when the trick-or-treaters arrive.
httpv://www.youtube.com/watch?v=HtpxKK6kfi4
The materials:
Parallax Infrared Motion Sensor #555-28027
ioBridge Control Module + Servo Smart Board (or arduino + motor shield, if preferred)
Hobbyist Servo
Resistor
Glue Gun
Mini-breadboard (I used my arduino protoshield from adafruit)
Some wire
2 Red Leds
Sharpie
Foam Skull
1 Sock (yeah, the hood is a black sock)
The object here was to simply make the skull do something when someone approached. I know this is FAR from original, but hey, I was pressed for time (and want to show that simple projects are really accessible to ANYONE) and didn’t want to do much planning. So, the project was born. I know I am not breaking any new ground here, but it didn’t detract from my bliss at annoying any co-worker who stepped in my office for the last 2 days. It did make the meetings more fun when the skull open his mouth to speak whenever a colleague would adjust their chair!
Steps:

Foam skull purchased for $1.50.
1- Took a saw to the lower jaw of the foam skull to detach it.

Lower jaw has been sawn off so it can be hinged
2- Bored 2 holes through the eye sockets out the back of the skull to run the LEDs and wires through

Bored 2 eyes into sockets to run LEDs into.

Testing that the LEDs are working and solder joints didn't break when inserting into skull.
3- Attached 2 long wires to the LED leads (drop of solder on each lead)
4- Whipped up a little rig for the servo and skull to sit on
5- Glue gunned lower jaw onto servo rig

Used glue gun to affix lower jaw.
6- Used sharpie to color in jaw (previously white because of styrofoam) and teeth.
7- Ran wires appropriately: (Digital Output – Eyes, Motion Sensor – Digital In, Servo Smartboard -Channel 1)
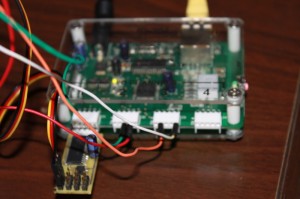
ioBridge wired up.
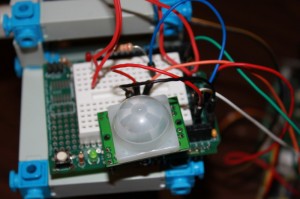
Parallax Infrared Motion Sensor #555-28027 on a protoshield from adafruit.
8- Set up messaging and triggers on ioBridge (or read digital input and write outputs if using arduino)
Note: I was actually unaware that the messaging and triggers for ioBridge were there, and they are easy to use (basically following the mantra of the platform). For an arduino, a simple read from the digitalIO and write to a PWM output using the servo library would do the trick, no problem!
Mouth closed.

Mouth opened.
9- Put sock over the skull

Skull with hood (not a gold-toe).
10- Annoy co-workers or greet tricker treaters.

