Tag: iobridge
Motion Feedback MP3 Trigger
by Steve Struebing on Apr.07, 2010, under technoPHILE
I posted over at Instructables a project that uses the Parallax PIR Motion Sensor (yes, it IS that same I used in the Halloween Hack, ye of the clan Observant) to encourage me to be working out. If I am, then I am rewarded with some tunes to keep moving along. However, if I am lazy and take a breather…well….. “No Snoop For You!”
The Parts List:
- SparkFun MP3 Trigger
- IO-204 Control Module
- Parallax PIR Motion Sensor
- PC Speakers
- Coffee Tin
- Drill
- 6xMachine Screws, and 12xNuts
Key objectives here:
- Try out the SparkFun MP3 Trigger
- Finally get a project into an enclosure that I think will be good for other people’s projects (this could be the next Altoids contender?)
- Delve into “Onboard Rules” functions of the IO-204 while offline
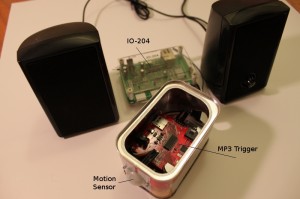
If you want more details, head over to the Instructables post.
Here is the project enclosure. Admit it, you love you some Maker’s Notebook, too, don’t you? The MP3 Trigger sits snug as a bug in a rug with the machine screws and nuts anchoring it in place. 2 additional ones hold the PIR Motion Sensor to the front of the tin. Getting the larger hole in the front and back was tricky because I did not have a great pair of snips around. I’ll know for next time! I did manage to wear through several Dremmel bit tips in my stubbornness of using the wrong tool for the job.

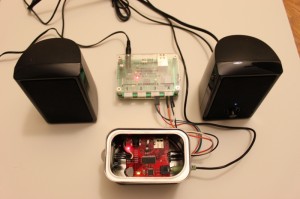
Here she be all wired up. Note, she AIN’T wired to the LAN, so this is using the “Onboard Rules” feature. If I did want to datalog the session, I would have to plug in to my router (which in this case really is not more than 10 feet away).
Half Hour Halloween Hack
by Steve Struebing on Oct.30, 2009, under technoPHILE

Skull furious you have entered his space
Halloween came out of nowhere this year for me. I have not had the time to do much of anything having just moved into a new house, so I took it upon myself to quickly whip up something to get into the Halloween mood. I was at a local store and saw these little foam skulls for $1.50 and grabbed a couple. Its fun to see what can be made quickly, and now I have something to put outside when the trick-or-treaters arrive.
httpv://www.youtube.com/watch?v=HtpxKK6kfi4
The materials:
Parallax Infrared Motion Sensor #555-28027
ioBridge Control Module + Servo Smart Board (or arduino + motor shield, if preferred)
Hobbyist Servo
Resistor
Glue Gun
Mini-breadboard (I used my arduino protoshield from adafruit)
Some wire
2 Red Leds
Sharpie
Foam Skull
1 Sock (yeah, the hood is a black sock)
The object here was to simply make the skull do something when someone approached. I know this is FAR from original, but hey, I was pressed for time (and want to show that simple projects are really accessible to ANYONE) and didn’t want to do much planning. So, the project was born. I know I am not breaking any new ground here, but it didn’t detract from my bliss at annoying any co-worker who stepped in my office for the last 2 days. It did make the meetings more fun when the skull open his mouth to speak whenever a colleague would adjust their chair!
Steps:

Foam skull purchased for $1.50.
1- Took a saw to the lower jaw of the foam skull to detach it.

Lower jaw has been sawn off so it can be hinged
2- Bored 2 holes through the eye sockets out the back of the skull to run the LEDs and wires through

Bored 2 eyes into sockets to run LEDs into.

Testing that the LEDs are working and solder joints didn't break when inserting into skull.
3- Attached 2 long wires to the LED leads (drop of solder on each lead)
4- Whipped up a little rig for the servo and skull to sit on
5- Glue gunned lower jaw onto servo rig

Used glue gun to affix lower jaw.
6- Used sharpie to color in jaw (previously white because of styrofoam) and teeth.
7- Ran wires appropriately: (Digital Output – Eyes, Motion Sensor – Digital In, Servo Smartboard -Channel 1)
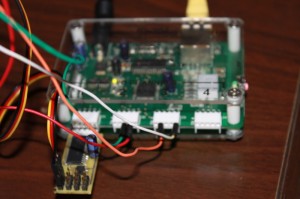
ioBridge wired up.
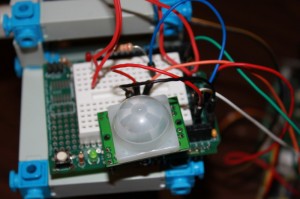
Parallax Infrared Motion Sensor #555-28027 on a protoshield from adafruit.
8- Set up messaging and triggers on ioBridge (or read digital input and write outputs if using arduino)
Note: I was actually unaware that the messaging and triggers for ioBridge were there, and they are easy to use (basically following the mantra of the platform). For an arduino, a simple read from the digitalIO and write to a PWM output using the servo library would do the trick, no problem!

Mouth closed.

Mouth opened.
9- Put sock over the skull

Skull with hood (not a gold-toe).
10- Annoy co-workers or greet tricker treaters.
HAPPY HALLOWEEN!
Solar-Powered Temperature Sensor
by Steve Struebing on May.18, 2009, under technoPHILE
Solar Powered Temperature Sensor
In case you’ve not heard, there is a Green Revolution in progress. To quote a popular commercial, “The way we use energy now can’t be the way we use it in the future. It’s not conservation, or wind, or solar. It’s all of it.” I have long kept a solar-energy project in the back of my mind, so I ordered a 12v/.2A solar panel power supply from a vendor (note: I erred while filming and said it is a 2A panel. It is a .2A panel). As a first step project, I figured I would power up my Arduino, use my shiny new XBee modules, and relay some sort of meaningful data back from this wireless solar-powered microprocessor.
httpv://www.youtube.com/watch?v=7A7coLAUyfQ
How is the weather outside today? If I am getting data, its sunny! And 65 degrees on my deck according to my newly built solar temperature probe.
XBee Communications
I did some first-steps using 2 Arduinos communicating over the default broadcast configurations over a span of about 2 feet.
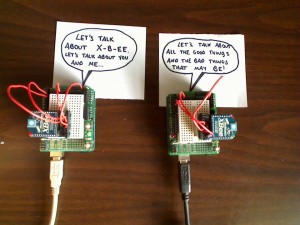
The Salt and Pepa of the Arduino world.
Arduino 1: “Yo. How you doing?”
Arduino 2: “Fine thanks. Wow, we are talking wirelessly.”
Arduino 1:” These are great days we’re living in, man.”
Arduino 2: “Now, if only I could unhook from this power cable.”
I settled down Arduino 2 after his diatribe likening himself to Pinnochio, and told him that I would take care of it.
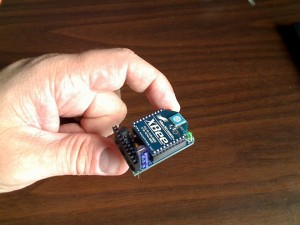
Detail of an XBee wireless communication module
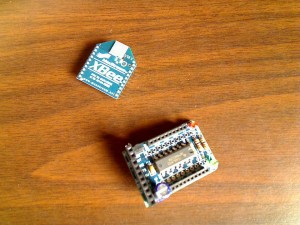
XBee Modem off of the adapter board
Serial Communications
After getting the Arduino twins talking (and hey, its all serial!) I grabbed my ioBridge and slapped on the Serial Communications smartboard. In about 1 minute, I had my ioBridge chatting with my Arduino. Sweet…. Now, on to untethering my Arduino. “I got no wires…to hold me down… la-la-la-la”
The Wireless Temperature Probe
I ran out to Radio Shack and picked up the right barrel plug adapter, and added some wires to run into the Arduino. Note: the jumper must be set on the Arduino to take power from external. My Solar Panel provides 12v, and the Arduino can take power up to 12v.
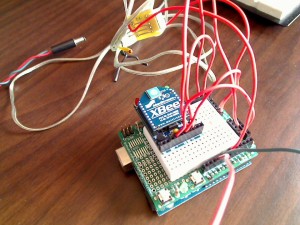
XBee hooked up to temperature sensor
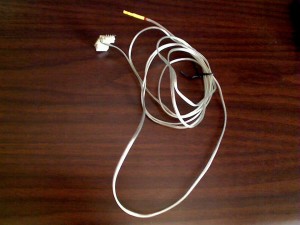
Temperature sensor
I used the temperature probe that I had from my ioBridge, crafted a quick sketch (see below) on the arduino (the analog scaling factor may be off since its not precisely linear, but c’est la vie) and waited for the sun. As soon as I plugged it in, the Arduino woke up, lights blinking, and was soon processing and wirelessly communicating! All this achieved because of energy provided by that flaming ball in the sky. Now that’s cool.
A quick run upstairs onto the ioBridge dashboard and guess what? The serial monitor widget was telling me what the temperature is outside. 65.31 degrees Farenheight. Wirelessly and without another power source…
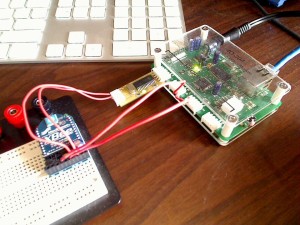
ioBridge and Serial Smartboard hooked up to XBee module

A nice springlike 65 degrees outside at the moment.
Conclusion
Now that I have a solar powered wireless microprocessor at my disposal, I am thinking of giving it some legs, and onboarding some Artifical Intelligence. Its top priority could be to take over the world. Take some solace in the fact that the processor is 1KB of RAM, 512 bytes of EEPROM, and runs at a “blazing” 16 MHz. If that’s not enough, then know that all you need to do to shut down its diabolical scheme is stand over it and block the sun. Hmm. Perhaps its better served as a temperature probe….. for now…
Sketch for Arduino
#include <NewSoftSerial.h>

NewSoftSerial xBeeSerial =  NewSoftSerial(2, 3);

void setup()  {

  // Initialize the on-board LED

  pinMode(13, OUTPUT);

  //Initialize the HW serial port

  Serial.begin(9600);

  Serial.println("Ready to send data:");

  // set the data rate for the SoftwareSerial port

  xBeeSerial.begin(9600);

}

void loop()                     // run over and over again

{

  //Read from the analog input from analog pin 0

  int tempValue = analogRead(0);

  // Send the message to the XBEE Transmitter

  xBeeSerial.print("Time: ");

  xBeeSerial.print(millis());

  xBeeSerial.print(" Value:");

  // Do scaling ~6.875

  float scaledValue = tempValue / 6.875;

  xBeeSerial.print(scaledValue);

  xBeeSerial.print("\n");

 // Update every 2 seconds

 delay(2000);

}
This Just In: The World Loves Beer
by Steve Struebing on Mar.19, 2009, under technoPHILE
Serv O’Beer has found some interest online through being covered at Instructables, Engadget, Gizmodo, Make, and others. Of particular interest is its inclusion in the How 2.0 section of Popular Science April 2009 edition, and PopSci Online. Yeah, the 100,000 YouTube views are eyebrow-raising as well. We really appreciate all of the comments and suggestions, and those who laughed along with us at the “usefulness” of a machine that can pour us a REAL beer using an iPhone.
You can see that the v 2.0 Serv O’Beer has been plated for ridigity, and some additional braces added to provide for a more smooth pour. Also a high torque servo has been added to allow it to serve as a brake, rather than just a pushing arm, and then a brake (hence the high volume of head in the beer).
Again, thanks to everyone who has laughed, sat confused, rolled your eyes, or said “Dude, that is sweet. You need a better outlet for your spare time”. Mostly, the latter. Just a closing note: The servo and the ioBridge do the work, I just get to use my Construx for something again, and drink 3-4 beers trying to calibrate this sucker. Sounds like a win-win to me.
Check out the article in the April Issue of Popular Science.
Thanks again, everyone. I’ll pour one for you!
Arduino/ioBridge Airsoft Target Range
by Steve Struebing on Jan.20, 2009, under technoPHILE
Indoor Airsoft Shooting Range
httpv://www.youtube.com/watch?v=CL8V2lk75G4
A friend of mine who is something of an avid shooter had mentioned the lack of affordable “action” type targets. After some discussion, we determined it would be fun to build such a contraption for some indoor airsoft practice. The Arduino Diecimilia was a great choice for the “programming side” of things (I have 2 of them, he has one as well).
As a shooter, you would want to be up-range from the targets, so having something portable with a web interface was a great solution so nobody would have to be “in the line of fire”. The iPod Touch and the ioBridge module I used in another recent project. Of course, why build a custom target enclosure when I could snap one together with my Construx.

Victory! Let the fun start!
I used 3 of my hobby servos to turn the target faces. I am tightening the Construx frame to the hobby servo mount.

Building the target faces
Arduino Pin-Outs:
- Pin 13 – Debug LED
- Pin 12- Ready for Command
- Pin 11 – PWM for Servo 1
- Pin 10 – PWM for Servo 2
- Pin 9- PWM for Servo 3
- Pin 8- Incoming Command Pin (PWM from IOBridge)
- Pin 7- Command Waiting from IOBridge
- Pin 2- Peizo Speaker Control
Not to mention the ioBridge wiring, and the Servo wiring. Yeah I have a diagram or I would STILL be working on it.
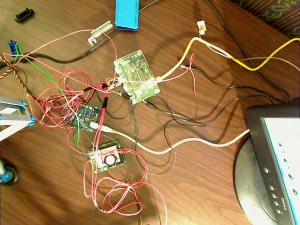
A rats nest of wires for the first pass
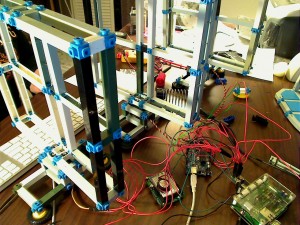
Debugging the system
It looks a monstrosity, but once the target face is on it, I cut up some cloth as the Airsoft BB trap, it will look just fine.

All done, ready to rock!
System debugged, targets turning! Now I can call out the programs remotely using the web browser in the iTouch and let the IOBrige tell the Arduino to do my bidding.
How the Airsoft Target Range Was Built
httpv://www.youtube.com/watch?v=Ww8qHa7d3Mw
Arduino Source Code: Arduino-ioBridge-Airsoft-Source-Code.txt
I would say this was a fun, interesting, and rewarding project. I have also made it future-proof enough to scale up the number of targets for even more options. For those of you airsofters who don’t want your skills to dull over the winter, turn your basement into a range!
Now, should I put hay-bales on a servo platform for an indoor archery range?
Happy tinkering!
Full Video Version (Combined Demo + Instructions)
httpv://www.youtube.com/watch?v=LpXecFOMGCk
Serv O’Beer
by Steve Struebing on Dec.31, 2008, under technoPHILE
With New Years fast approaching, I wanted to make a project that allows for the perfect pour and take out all of that physical work. Using Construx as the mechanical platform, a servo driving the action, and ioBridge controlling the system, I was to achieve “the perfect pour” controlled with the turning of my iPhone (using the accelerometer feedback determing the screen orientation). We’ve all seen the iBeer application on the iPhone, and now I can actually enjoy the IPA rather than just virtually pouring!
httpv://www.youtube.com/watch?v=NtUyzQBNT3k
UPDATE:
The information about this project can be found at Instructables.com including steps to make it. Also, you will see the project was picked up at Gizmodo, Engadget, ioBridge Projects, and the fine folks over at MAKE.

