Tabletop Trebuchet
by Steve Struebing on Feb.11, 2009, under technoPHOBE
Tabletop Trebuchet
The trebuchet was a siege weapon with an interesting and complex history. Where some weapons employed torsion of ropes or sinews (such as the ballista, catapult, onager, espringal, etc) the trebuchet was a great advance as it used a massive counterweight to store the potential energy. Nowadays, these machines are used to throw pumpkins, cars, or just about anything. They are also the objects of much analysis for people trying to understand physics. This is an interesting and efficient throwing machine, so I had to build one. It has even recently been featured on Make.
While there are many kits out there and “right ways to build” a trebuchet, I wanted to simply go on illustrations from a book I had received for Christmas. Reverse Engineering, old school.
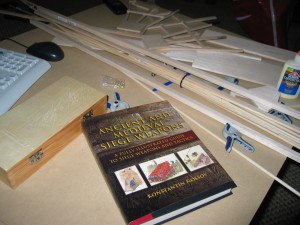
Armed with the tools of the trade, a book on the subject, and some time,it was time for a build.
Here is the workspace in my basement. The trebuchet was to be built from scratch using balsa, basswood, and some dowel rods.
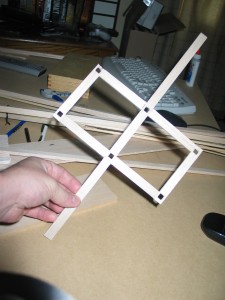
Built base. Notched 6 positions for frames using X-Acto knife. Also note lateral stabilizing arms.
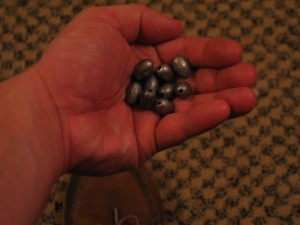
Counterweights- fishing sinkers
Building the Basket
This was one of the more “complex” parts of the build. The basket had specific shape requirements to keep the basket from flipping over, and had to hold a good amound of weight relative to the build material (balsa). Lastly, it could not dump the lead weight as it accelerated downwards.
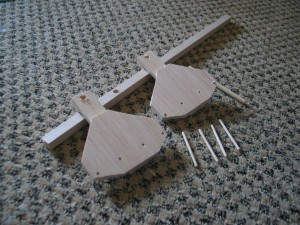
Basket parts and throwing arm pre-assembly
The two basket sides and the basswood throwing arm. Also 4 dowel rods are used to give additional support under the lead sinkers used as counterweight mass.
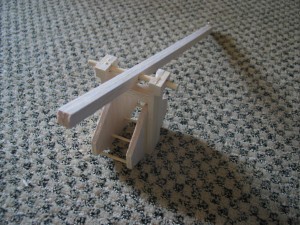
Built basket and arm.
Almost fully built basket. Need to add planking to the base so the lead won’t fall out. Also need some washers on the sides of the arm to minimize friction loss. The dowel pegs do add quite a bit of strength and stability.
Building the Frame
This was very derivative off what I saw the in my Ancient and Medeival Siege Weapons book. Its a rather simple A frame with some additional supports, but I added 2 basswood squares to stabilize the frame and give the throwing arm axle something firm to rotate through.
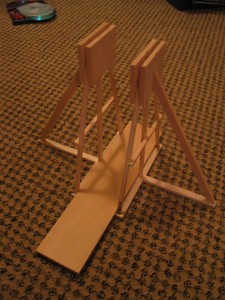
Build stand and throwing track.
The built up frame. Also note the flat track for the sling and projectile to slide with minimal friction as it accelerates. Here you can see the angled braces keeping the frame up (that were coming out of the sides of the base).
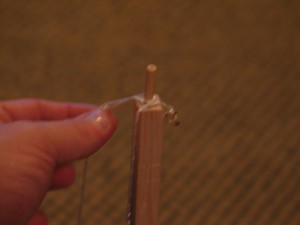
Sling release. This is a small dowel peg at the end of the throwing arm where one end of the sling is tied, and the other is looped over the peg to slide off at the proper point.
Detail of the sling. I screwed a small brass eyelet here to tie one end of the sling string to. The other has a simple tied loop, and is able to slide off as the sling angles around the throwing arm.
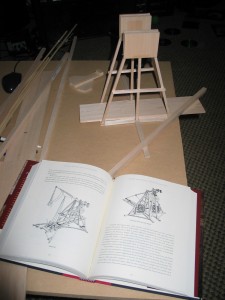
Illustration of the frame, and the book image used as the subject of some reverse engineering.
Take a look at the illustration. See any similarities? Ah, yes. The hamster wheels are missing. Those were used for men to wheel the heavy arm back down, and the counterweight back up. Real hamsters would be appropriate at this scale.
Ready, Aim, Fire
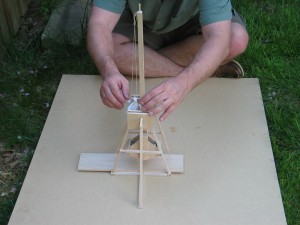
Trebuchet in resting (vertical) position. The counterweight is directly below the throwing arm at its lowest energy.
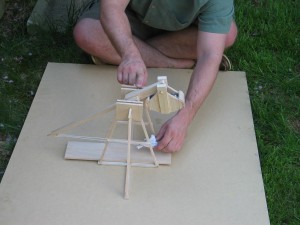
Trebuchet in loaded position. I am holding the sling with my left hand.
Conclusion
I really don’t know when I became interested in this neat little machine. I had stumbled upon The Grey Company’s Site, and their trials to build this class of tabletop trebs called “Cheese Chuckers”. There are sophisticated software packages that will allow you to run simulations to optimize your machine. Whether you want to build one to throw a car, or as I did, one to roll a die in a room at least 30 feet long, you can rest assured that your home is safer with one of these siege engines standing guard.


November 19th, 2010 on 12:38 pm
Thanks for the detailed pictures and video for a complete feel of what it is like to build a Trebuchet. It’s FUN! When I planned to build a Trebuchet I searched all over and never saw your site. I’m glad I found it. I’ve been trying to share what I’ve learned much like you have done here. I wish there was a way to video using a Trebuchet and be able to really capture the projectile. When I video it looks like yours does, where the problem is the sling and projectile move so fast they kind of disappear in the video. Unless you’re shooting something as large as a piano all the videos tend to have this problem. I’d like to fire a camera that was in a cage so you could really show it! Thanks!
November 23rd, 2015 on 1:22 pm
[…] Tabletop Trebuchet […]