Tag: warfare
-
Miniature Wargaming Series- 4 Painting the Marines
Learning to paint Rebelminis regular (marines) miniatures for Ambush Alley game.
-
Miniature Wargaming Series- 3 Painting the Insurgents
Welcome to the third installment of our wargaming series (focusing on Ambush Alley). Just a note before I begin about 15mm miniatures. There are tons of people out there who can make stunning, photo-realistic, perfect minis even at 15mm. 28mm minis can show a lot of detail and painting errors on the table top. However,…
-

Miniature Wargaming Series- 2 Making Terrain
This is a step-by-step tutorial on how to construct buildings for a middle-eastern town for 15mm modern wargaming.
-
Miniature Wargaming Series- 1 Building the Board
This will be a slight divergence from technologies vs. anti-technology type projects. I have been an avid player of games for a long time. Perhaps not everyone is aware, but there has been an renaissance of boardgames while the American boardgame market has been fairly dominated by “old favorites” like Monopoly, Stratego, Risk, and others.…
-
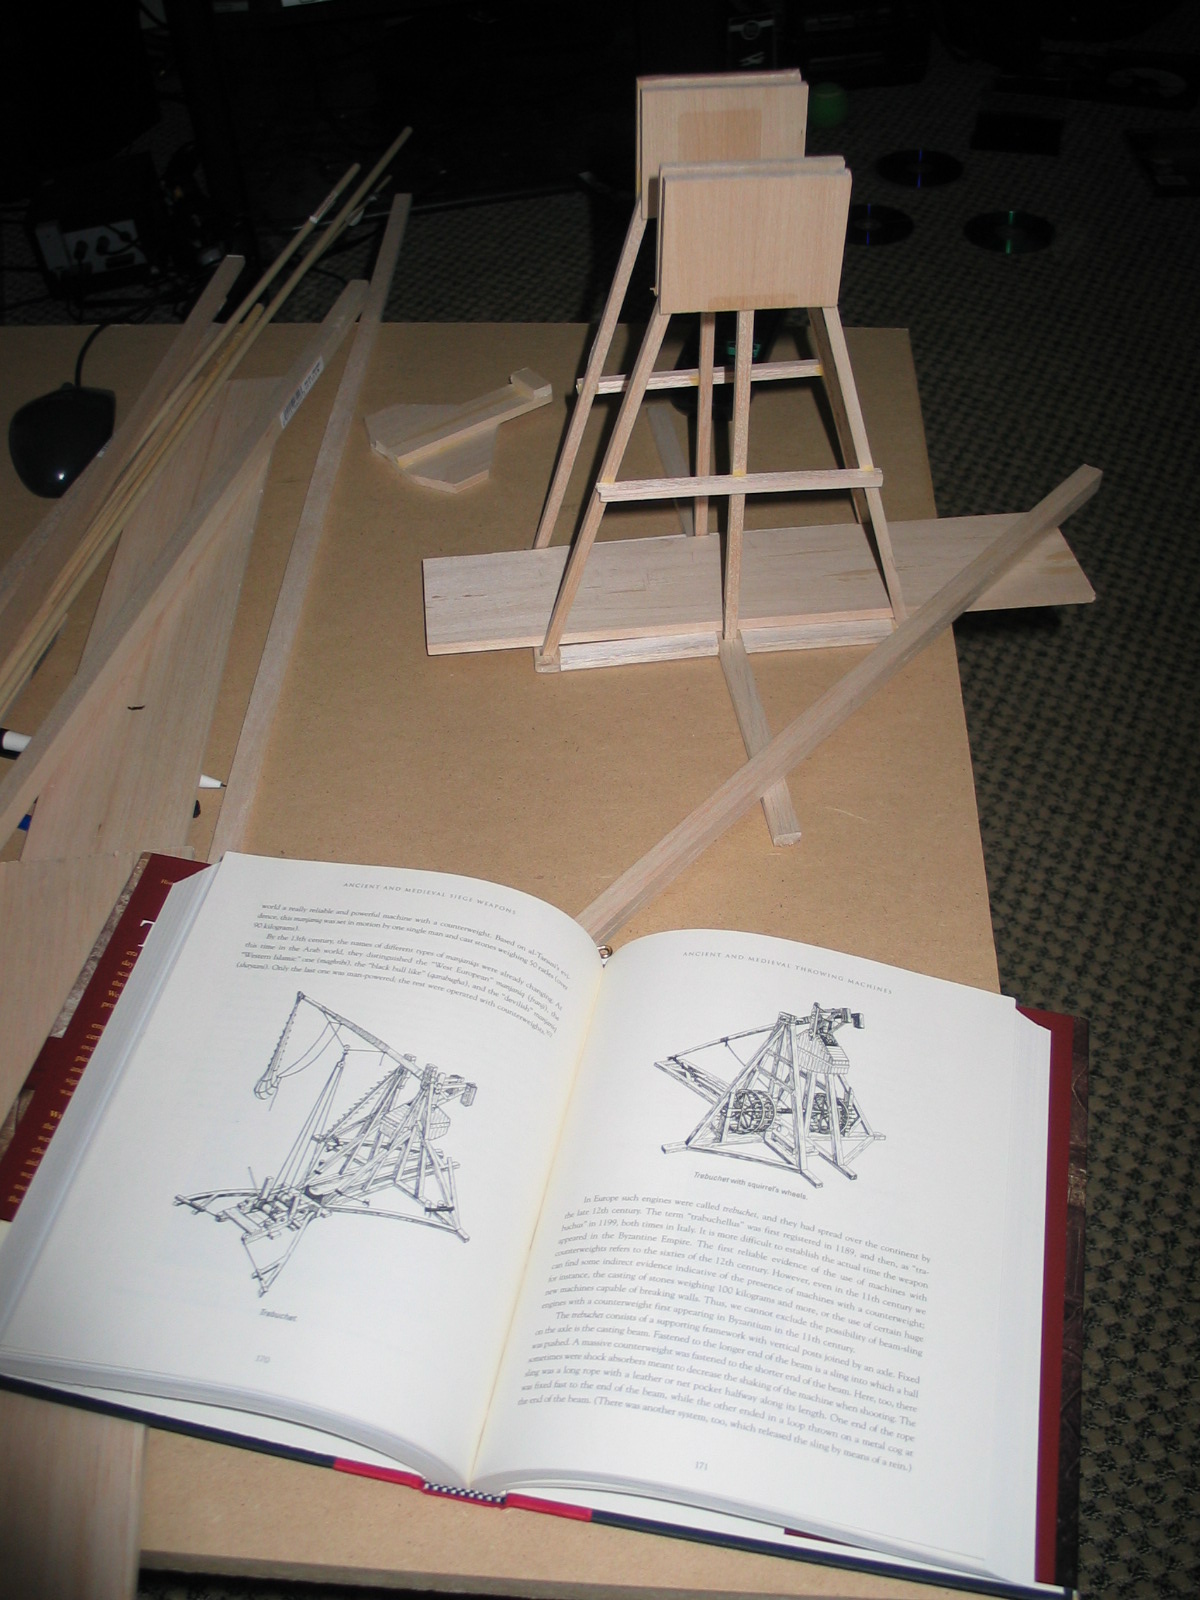
Tabletop Trebuchet
Tabletop Trebuchet The trebuchet was a siege weapon with an interesting and complex history. Where some weapons employed torsion of ropes or sinews (such as the ballista, catapult, onager, espringal, etc) the trebuchet was a great advance as it used a massive counterweight to store the potential energy. Nowadays, these machines are used to throw…