Tag: green
Wild Garlic Soup
by Steve Struebing on May.15, 2011, under technoPHOBE
As a kid growing up in Western Pennsylvania, we always seemed to have shoots of a particular weed growing up ahead of the grass in the spring. Obviously being an inquisitive (and foolish?) kid, I would pick it up, and immediately noticed a strong garlic or onion aroma. Not long after, I would nibble on the shoot, and it tasted like chives. Every once in a while as I was idling through the woods, I would pick up a shoot of this wild garlic and nibble on it.
I have since moved to Virginia, and my new lawn has more than its fair share of wild garlic (and acorns). Rather than fight it, I figured I would embrace it and use it for a nice garlic soup!
Harvesting
WARNING: Always positively ID a plant before consumption. There are two varieties of wild plant that look like Wild Garlic or Wild Onion, and are dangerous (Star of Bethlehem, and Death Camas). I did not know this until I did some net research.
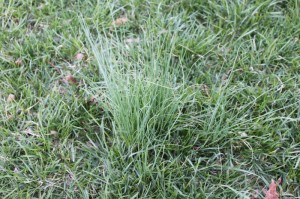
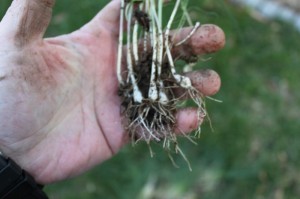
I went to my front yard where the garlic was growing in early spring. It grows in little clusters shooting up through the grass.
Preparation
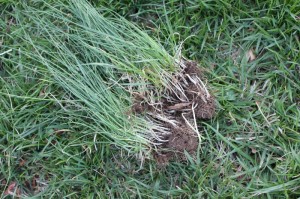
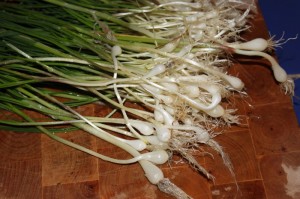
Now that I had a full bag picked in very short order, I selected out the largest of the bulbs (probably not required) for preparation. This consisted of teasing out the grass that had been dug out along with wilted or dried debris. Then the bulbs were washed free of dirt and I cut the stringy beard of the garlic off and removed the outer layer of the bulb. Once the knife hit the garlic, the aromatic part of preparation was in full swing. It was not nearly as strong in scent or eye-watering as cutting through a pile of red onion making salsa, but has a subtle onion odor.
Making the Soup
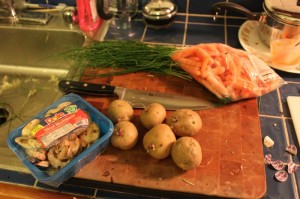
Now.. I am not a great cook. I am not even a good cook! I have my 3-4 go-to dishes that I am sure my friends and wife are sick of, but that is all I am really comfortable with. I do love soups in the winter, and would like to get better about making it and reheating it for a warm bowl of deliciousness when I want it. I scanned the web for a recipe making vegetable broth. I did not want to use beef or chicken stock because I figured this would overpower the star of the show, our Garlic. I selected some “neutral” ingredients that I thought would work well together.
- Wild Garlic (shocker, I know)
- Water
- Salt
- Pepper
- Bay Leaves
- Carrots
- Mushrooms
- Potatoes
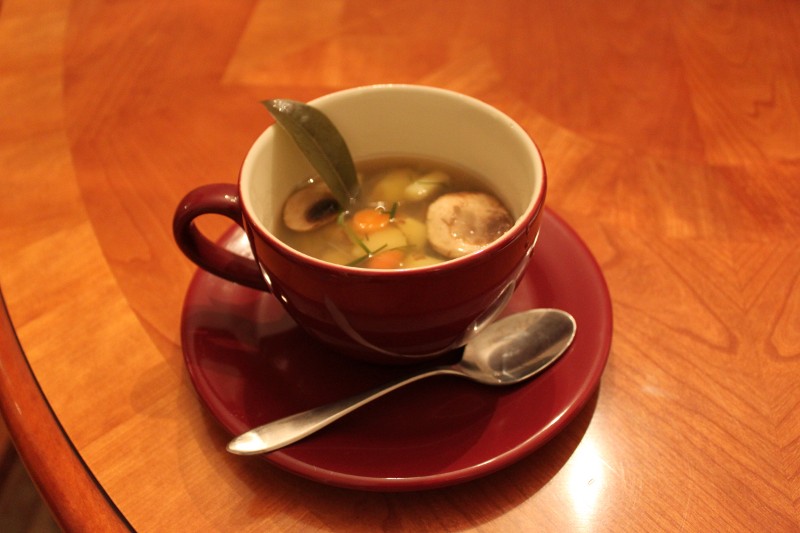
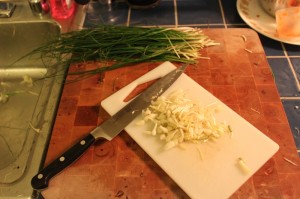
I diced the carrots and cut the potatoes into nice chunks. I brought the water, garlic bulbs, salt, pepper, carrots, and bay leaves to a boil and let them simmer for about 25 minutes. After that, I added the potatoes, mushrooms for another 30 or so minutes. At the end, I threw in a handful of the chopped up garlic shoots for more flavor and texture so as to not soften them too much in a long simmer. Pull out the bay leaves, and we are done!
Bon Appetite!
And with that, a little bay leaf for presentation, and we are ready to enjoy. I think it turned out nicely. I perhaps over-peppered and salted and perhaps not long enough simmering the broth, but there was not a lot of other flavors to compete with the garlic. They were very mild in the soup, and I would have to say it was good enough to have another bowl of, and another a couple days later. The garlic is versatile and people comment on throwing it in salads, on top of fresh tomatoes and mozzarella, or other foods. It’s not good enough to crack into the standard 4 meals I prepare, but it’s good to get outside of the comfort zone, and like the acorn flour, enjoy something from the grocery store feet from my house.
Making Acorn Flour and Muffins
by Steve Struebing on Dec.14, 2009, under technoPHOBE
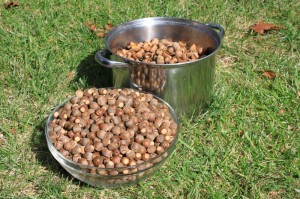
Acorns from my Oak out front
I am trying to recall the exact moment when I set my mind to making food from acorns. It could have been any of the following moments:
a) When reading “When Technology Fails” I wanted to take a stab at more self-sufficiency
b) When I listened to “Everybody Dance Now” I was inspired by “I’m just a squirrel tryin’ to get a nut”
c) When I moved to into my new house this summer, I saw the MASSIVE oak out front and knew the acorns were coming

Oak tree - the acorn donor
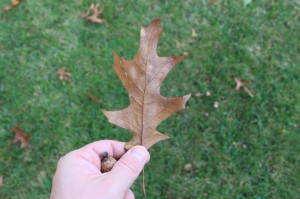
Oak leaf
Whatever planted the seed, it was obvious that I needed to make acorn flour. Apparently, acorn flour was a food that was made by native peoples (I have since confirmed reading some blogs of families of Native American descent who used to hoard massive amounts of acorns for making food).
The first step was harvesting the acorns. At the beginning it was not terribly easy as I stalked the yard (to the bewilderment of my new neighbors who must have thought me out of my mind… or rather, having “gone nuts”) looking for an acorn that had not fallen far from the tree. It became increasingly easy as the season wore on and by the end of fall, I was kicking myself for trying so hard at the beginning of fall where by the end I could, and did, rake bags full of the stuff. Ah well, you live you learn.
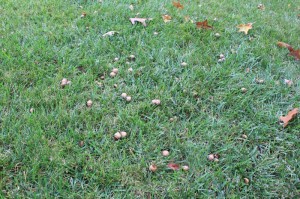
Acorns lying in the front yard
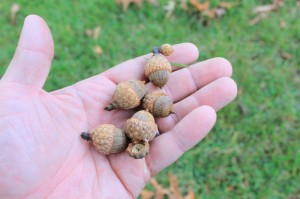
Not just for squirrels anymore
After having gathered what I considered a reasonable amount, the next step was removing the acorn top cupule. No, I did not know that word before I looked it up. Feel free to use it in scrabble for 10 points. That was easy enough for the “early season” acorns, and virtually did the job by itself for the late season ones.
Next was going through the stash and finding any acorns that showed evidence of rot, or worms.
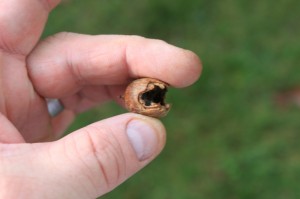
Damaged acorn
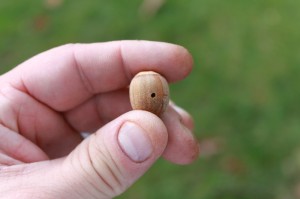
Telltale sign of worm presence
Next, and certainly the most fun (please note sarcasm) part of the process was shelling. I tried just using my hands, then a few with teeth, and finally settled on a set of adjustable pliers the perfect width to apply enough pressure just to crack the shell when closed. It was a slow and tedious process of cracking and peeling the somtimes stubborn shell from the nutmeat. Many a football Sunday was spent watching a game and shelling acorns. Yeah its weird, but damnit I was determined. When it was all said an done, the shelled acorns gave off a sweet, nutty, almost bourbon scent.
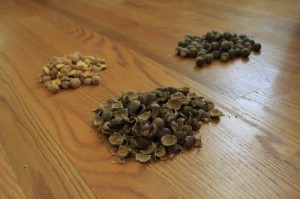
Unshelled, shelled, and acorn shells
So before you just run off and throw a handfull of shelled acorns into your mouth and consider yourself educated, there is something you should know about acorns. Apparently they are very high in tannic acid. This is not good for your system (I have read somewhere that even animals may wait for rains to rinse the tannins). Take a small nibble of an acorn and you will feel that rough acidic bitterness that will turn you off from said handfull. The proces of removing this water-soluble acid from the nutmeat is called leaching. I effectively chopped the acorns into smaller bits to increase the surface area and allowed the water to do its work.
The water browned significantly the first morning, so I changed the water. Then the first night, so I changed the water. Then day 2 morning and night so I changed the water. Then day 3…then day 4… you get the point. 2 water changes for over 2 1/2 weeks. After that time, I tasted the acorn and there was very little residual acidicy, so it was onto the drying phase. I have read its possible to to leach by putting a pillowcase of acorns in stream for a while to do this, or in extreme cases, put them in the upper tank (I repeat, UPPER TANK) of a toilet because the water is clean and changes regularly. I didn’t do this.
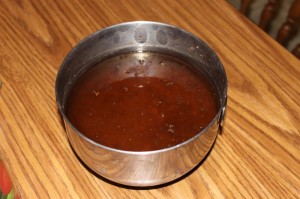
Water browned from tannis being leached out
The nutmeat was spread evenly onto a baking pan and I forced my wife to make pizza so I could use the “leftover” heat to dry the acorns. I think they were left in for too long as is evidenced through significany browning. They were almost a coffee roast, but smelled good.
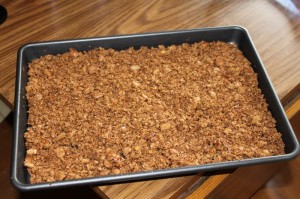
Wet acorn nutmeat before drying
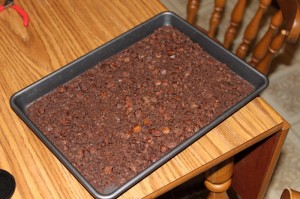
Oven-dried (and roasted) acorns
Ever the purist, I went the motar and pestle route to mill them. (Footnote: This inspired me to read about millstones, which are more fascinating than you think. Take a quick read about the patterns millstones cut with and how they are dressed. I thought they just pulverized, which they do not). After a laborious while, I had made a small bit of flour. Losing steam, I went to my coffee burr grinder and made quick work of the rest, grinding into a fine flour.
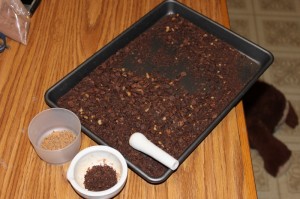
Milling the hard way - Mortar and Pestle
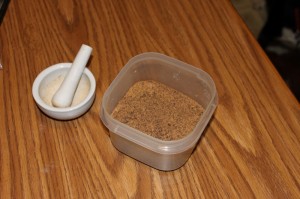
After milling the easy, and non-purist, way. Boo technoPhiles!
The last step was to make something edible. The flour tasted fine by itself. Somewhat bland
but with a nice nutty finish. My wife was kind enough to look up a “Traditional Acorn Flour” recipe for Acorn Muffins.
They turned out very dark and after a first taste they were…shall we say….harsh. It didn’t matter and I stubbornly gagged down the muffin, grinning in my self-sufficiency. The recipe did not call for butter nor sugar. I quickly topped them with sugar and ate one with butter. It was much better that way.

Sugar-topped acorn muffin
Nutrition Facts (from http://www.elook.org/nutrition/nuts/3218.html)
Serving Size: (100 grams)
Amount Per Serving
Calories: 501
% Daily Value*
Total Fat 30g 46%
Saturated Fat 4g 19%
Cholesterol 0mg 0%
Sodium 0mg 0%
Total Carboydrates 55g 18%
Dietary Fiber 0g ~
Sugars 0g ~
Protein 7g 14%
Vitamin A 1% Vitamin C 0%
Iron 6% Calcium 4%
So, my technoPhobe friends, this was a fine day. I have never really been a gardener or worked on a farm. I like most Americans get my food from the store. This was about finding a small amount of nutrition raining down in my front yard. It was more time and effort than I was expecting, but its encouraging to think that if I had to, I could survive a couple days by spending a bit of time under an oak. All the better if its mine…
Solar-Powered Temperature Sensor
by Steve Struebing on May.18, 2009, under technoPHILE
Solar Powered Temperature Sensor
In case you’ve not heard, there is a Green Revolution in progress. To quote a popular commercial, “The way we use energy now can’t be the way we use it in the future. It’s not conservation, or wind, or solar. It’s all of it.” I have long kept a solar-energy project in the back of my mind, so I ordered a 12v/.2A solar panel power supply from a vendor (note: I erred while filming and said it is a 2A panel. It is a .2A panel). As a first step project, I figured I would power up my Arduino, use my shiny new XBee modules, and relay some sort of meaningful data back from this wireless solar-powered microprocessor.
httpv://www.youtube.com/watch?v=7A7coLAUyfQ
How is the weather outside today? If I am getting data, its sunny! And 65 degrees on my deck according to my newly built solar temperature probe.
XBee Communications
I did some first-steps using 2 Arduinos communicating over the default broadcast configurations over a span of about 2 feet.

The Salt and Pepa of the Arduino world.
Arduino 1: “Yo. How you doing?”
Arduino 2: “Fine thanks. Wow, we are talking wirelessly.”
Arduino 1:” These are great days we’re living in, man.”
Arduino 2: “Now, if only I could unhook from this power cable.”
I settled down Arduino 2 after his diatribe likening himself to Pinnochio, and told him that I would take care of it.

Detail of an XBee wireless communication module
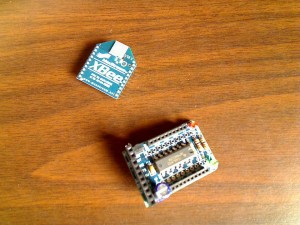
XBee Modem off of the adapter board
Serial Communications
After getting the Arduino twins talking (and hey, its all serial!) I grabbed my ioBridge and slapped on the Serial Communications smartboard. In about 1 minute, I had my ioBridge chatting with my Arduino. Sweet…. Now, on to untethering my Arduino. “I got no wires…to hold me down… la-la-la-la”
The Wireless Temperature Probe
I ran out to Radio Shack and picked up the right barrel plug adapter, and added some wires to run into the Arduino. Note: the jumper must be set on the Arduino to take power from external. My Solar Panel provides 12v, and the Arduino can take power up to 12v.

XBee hooked up to temperature sensor

Temperature sensor
I used the temperature probe that I had from my ioBridge, crafted a quick sketch (see below) on the arduino (the analog scaling factor may be off since its not precisely linear, but c’est la vie) and waited for the sun. As soon as I plugged it in, the Arduino woke up, lights blinking, and was soon processing and wirelessly communicating! All this achieved because of energy provided by that flaming ball in the sky. Now that’s cool.
A quick run upstairs onto the ioBridge dashboard and guess what? The serial monitor widget was telling me what the temperature is outside. 65.31 degrees Farenheight. Wirelessly and without another power source…

ioBridge and Serial Smartboard hooked up to XBee module

A nice springlike 65 degrees outside at the moment.
Conclusion
Now that I have a solar powered wireless microprocessor at my disposal, I am thinking of giving it some legs, and onboarding some Artifical Intelligence. Its top priority could be to take over the world. Take some solace in the fact that the processor is 1KB of RAM, 512 bytes of EEPROM, and runs at a “blazing” 16 MHz. If that’s not enough, then know that all you need to do to shut down its diabolical scheme is stand over it and block the sun. Hmm. Perhaps its better served as a temperature probe….. for now…
Sketch for Arduino
#include <NewSoftSerial.h>

NewSoftSerial xBeeSerial =  NewSoftSerial(2, 3);

void setup()  {

  // Initialize the on-board LED

  pinMode(13, OUTPUT);

  //Initialize the HW serial port

  Serial.begin(9600);

  Serial.println("Ready to send data:");

  // set the data rate for the SoftwareSerial port

  xBeeSerial.begin(9600);

}

void loop()                     // run over and over again

{

  //Read from the analog input from analog pin 0

  int tempValue = analogRead(0);

  // Send the message to the XBEE Transmitter

  xBeeSerial.print("Time: ");

  xBeeSerial.print(millis());

  xBeeSerial.print(" Value:");

  // Do scaling ~6.875

  float scaledValue = tempValue / 6.875;

  xBeeSerial.print(scaledValue);

  xBeeSerial.print("\n");

 // Update every 2 seconds

 delay(2000);

}

