Learn by doing. Teach by sharing.
-
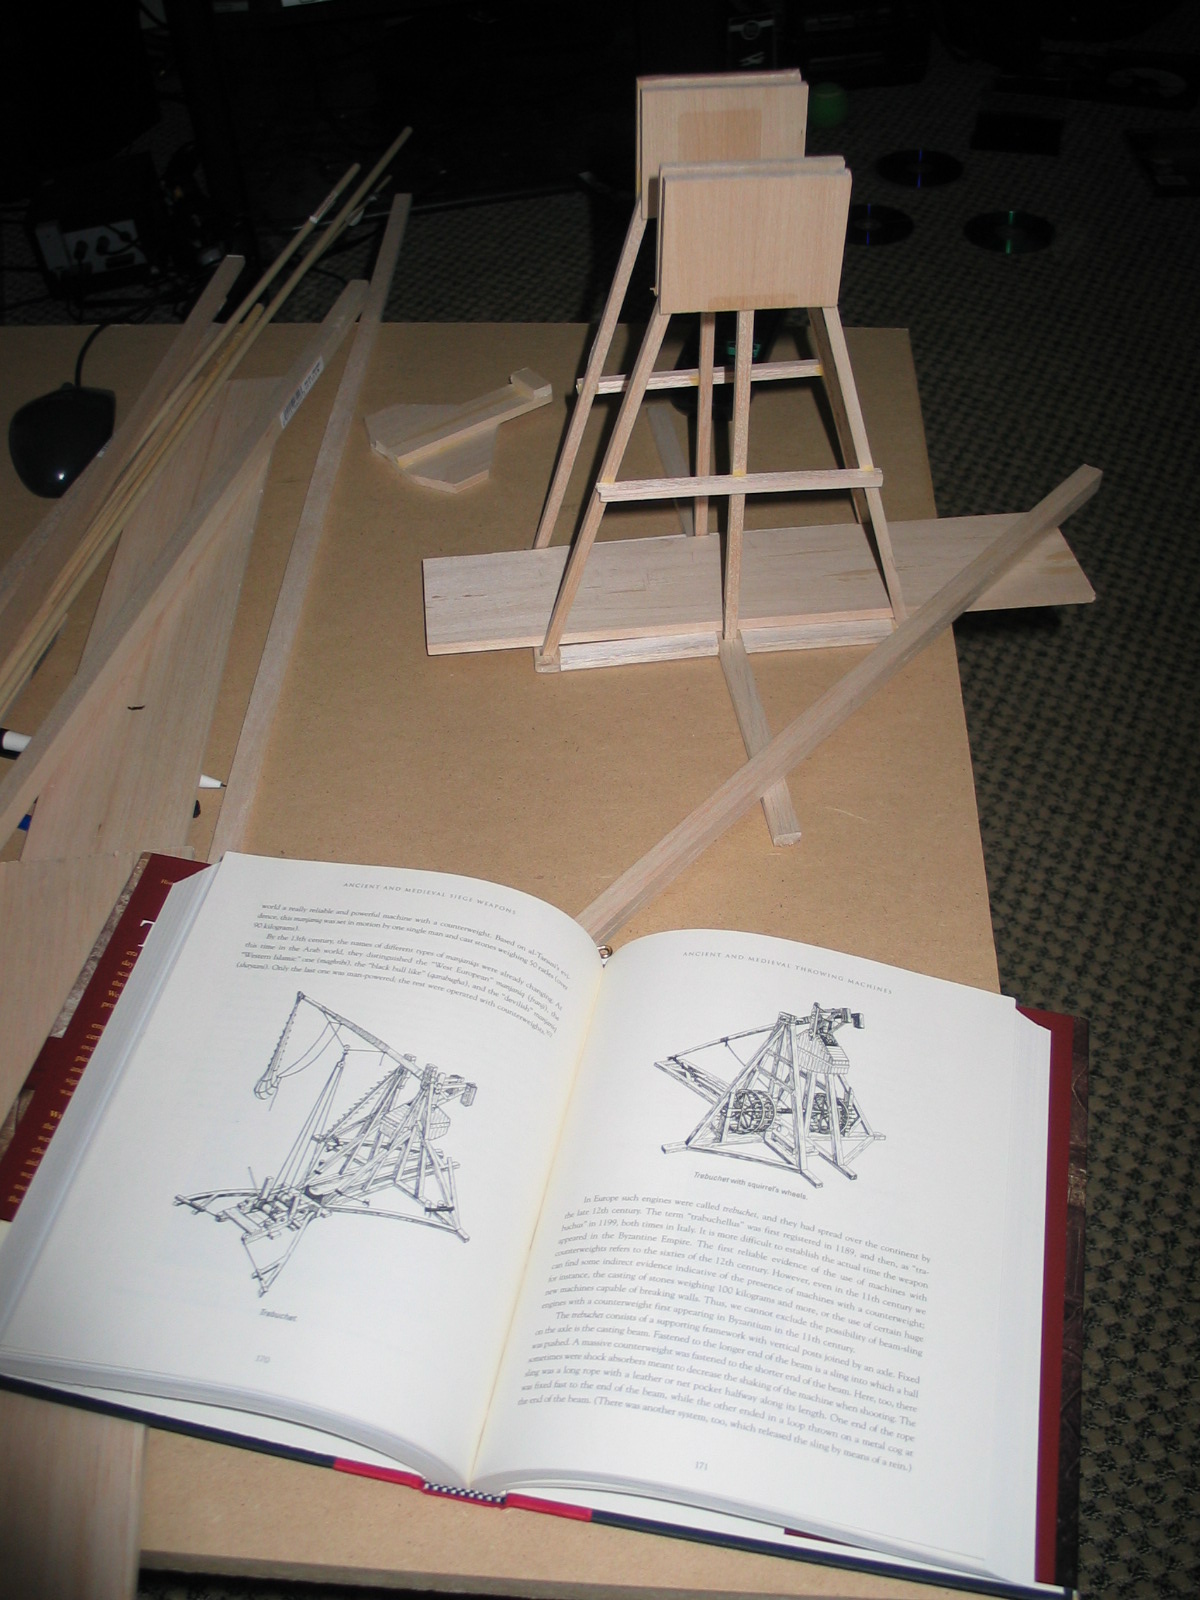
Tabletop Trebuchet
Tabletop Trebuchet The trebuchet was a siege weapon with an interesting and complex history. Where some weapons employed torsion of ropes or sinews (such as the ballista, catapult, onager, espringal, etc) the trebuchet was a great advance as it used a massive counterweight to store the potential energy. Nowadays, these machines are used to throw…
-
Arduino/ioBridge Airsoft Target Range
Indoor Airsoft Shooting Range httpv://www.youtube.com/watch?v=CL8V2lk75G4 A friend of mine who is something of an avid shooter had mentioned the lack of affordable “action” type targets. After some discussion, we determined it would be fun to build such a contraption for some indoor airsoft practice. The Arduino Diecimilia was a great choice for the “programming side”…
-
Serv O’Beer
With New Years fast approaching, I wanted to make a project that allows for the perfect pour and take out all of that physical work. Using Construx as the mechanical platform, a servo driving the action, and ioBridge controlling the system, I was to achieve “the perfect pour” controlled with the turning of my iPhone…
-

Weaving a Quiver
Why Weave? So you may rightly be asking yourself “What in this dude’s right mind does he want to have to do with weaving? Doesn’t he have anything better to do?”. A fair question. However, let me take a moment to defend myself. Really the catalyst of all this, and a lot of the technoPhobe…
-

Building a Longbow
I’ve long had an interest in constructing one of the simplest (yet most elegant) of weapons that has had a significant impact on history (Agincourt) . That is the longbow. What a simple machine that stores the force and hurls an arrow at impressive speeds. I did some “light” reading on the subject about the…